My love affair w/ lasagna goes back to my childhood. My parents would make spinach noodles for lasagna that would stretch across the kitchen. My mom made her lasagna w/ these sheets of noodles, Bolognaise sauce, and bechamel sauce.
The baking pan is the same one my mom used, however, I took a different, and easier path in making my lasagna, as you will see in my recipe. Also, rather than par boil the noodles, I used Ina Garten’s method of softening the noodles. She would put the dry lasagna noodles in a baking dish, and submerge them in the hottest water you can get out of the tap for 20 minutes.
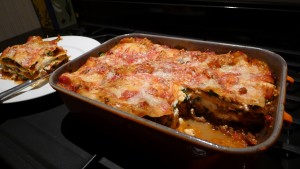
Believe it or not, this was my first attempt at making lasagna, and I have to admit the results not only looked good, but tasted fantastic too! Like Garfield, I can’t resist a good pan of lasagna!!
Lasagna
Ingredients:
1 pound box lasagna noodles (use what you need, depending on the size of your baking pan)
1 28 ounce can San Marzano tomatoes
2 pounds Italian sausage
2 pounds ricotta cheese
1 1/2 cups freshly grated parmesan cheese
1/3 pound fresh baby spinach leaves
1 medium yellow onion – medium dice
4 cloves garlic – pressed
2 tbsp. olive oil
1 tbsp. dried oregano
1/2 tsp. red pepper flakes
salt and pepper
Procedure:
1) Soak noodles using Ina Garten’s method noted above.
2) Make tomato sauce w/ San Marzano tomatoes, 1 tbsp. of the olive oil, onion, garlic, dried oregano, and red pepper flakes. Salt to taste.
3) Brown the Italian sausage in the remaining tbsp. of olive oil. Salt and pepper to taste.
4) Get all ingredients lined up in the order of layering, prior to assembling your lasagna. Reserve the parmesan cheese for the final step of baking.
5) Preheat oven to 375 degrees F.
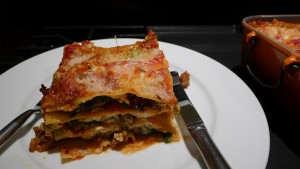
6) In a deep 8 x 11 inch baking pan, start assembling your lasagna (keep in mind the amount of ingredients you have will need to evenly cover 3 layers, and you’ll need a bit of the tomato sauce for the top and bottom): spread a small amount of the tomato sauce in the bottom of your baking pan, then add a layer of noodles, a layer of sauce, a layer of sausage, a layer of spinach leaves, then dab on a layer of ricotta. Repeat this process (noodles, tomato sauce, sausage, spinach leaves, ricotta) for the next 2 layers. Top the lasagna w/ the final layer of noodles and the remaining tomato sauce. Wrap pan tightly w/ aluminum foil.
7) Place lasagna on the middle rack of your oven and bake for 40 minutes, rotating pan front to back after 20 minutes for a more even bake.
8) After 40 minutes, remove foil, evenly sprinkle the parmesan cheese over the lasagna, and continue baking, uncovered, for another 20 minutes.
9) Remove lasagna from the oven, and let cool for 5 to 10 minutes before serving.
Yield: 6 servings
Enjoy a taste of Italy! Buon appetito!!
Bruno