pornjk, pornsam, xpornplease, joyporn, pornpk, foxporn, porncuze, porn110, porn120, oiporn, pornthx, blueporn, roxporn, silverporn, porn700, porn10, porn40, porn900

Author Archive for brunosdreamPage 22 of 29

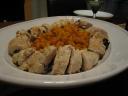
Chicken Roulade Stuffed w/ Spinach, Mushrooms & Proscuitto; Butternut Squash w/ Sage Brown Butter

chix-roulade1.jpgchix-roulade4.jpgchix-roulade2.jpg

This is a first for me… making a meal at my friends’ house which included items from 2 previous posts – Julia Child’s French bread and biscotti. We hit a trifecta w/ this meal! We had the bread w/ the main dish and the biscotti for dessert. All in all, it was a delicious meal, and best of all, I didn’t have to do the dishes since I did the cooking!

Ingredients:

5 chicken breasts

8 oz. crimini mushrooms – slice half  and rough chop half

1 bag baby spinach

1 large butternut squash - peeled, seeded and cut into 1 inch cubes

5 slices proscuitto – cut into 3/4 inch squares

5 cloves garlic – minced

1/4 teaspoon red pepper flakes

2 tablespoons unsalted butter

1 quart veggie stock

4 dried sage leaves – crumbled

1 large shallot – brunoised

1 tablespoon buerre manie (equal parts flour and butter blended into a paste)

olive oil

salt + pepper

Procedure:

1) Gently pound chicken breasts between 2 pieces of plastic wrap until 1/2 inch thick.

2) Lightly saute’ proscuitto in a non-stick pan; let cool.

3) Saute’ spinach in olive oil w/ 2/3rds of the garlic and all of the red pepper flakes; salt to taste and let cool.

4) Saute’ chopped mushrooms in olive oil w/ remaining garlic; salt and pepper to taste and let cool.

5) For sauce: Sweat the shallots in olive oil until opaque, add sliced mushrooms and lightly saute’ until soft, then add veggie stock and reduce to 1 1/2 cups. Once reduced, add buerre manie to thicken; salt and pepper to taste and remove from heat.

6) Blanch squash for 3 minutes in well salted water. Strain and set aside.

7) With wide side of chicken breast towards you, spread in a line 1/5 of the spinach, chopped mushrooms and proscuitto, roll up the breast leaving seam side down then secure w/ kitchen twine. Repeat process w/ remaining breasts.

8) Preheat oven to 375 degrees F.

9) Brown chicken rolls on all sides, place in an oven pan, cover w/  foil and bake for 25 minutes or until internal temperature is 150 degrees F.

10) Remove chicken from oven and let rest, covered, while you finish preparing the squash.

11) Add butter to a large, deep pot and heat until it turns brown; add squash, sprinkle in the sage and toss to coat w/ butter. Continue tossing occasionally until squash is warmed through; pepper to taste and add salt if needed.

12) Reheat sauce, remove twine from chicken rolls and slice 1 3/4 inches thick.

13) In a large serving dish, place squash in center, then arrange chicken slices around the squash.

14) Place sauce in a small bowl and serve w/ chicken.

15) Dinner time!

Happy Spring!!

 Bruno

Julia Child’s French Bread

 daring-bakers.jpg February Challenge hosted by Breadchick Mary at The Sour Dough and Sara at I Like to Cook.
french-bread7.jpgfrench-bread5.jpgfrench-bread4.jpg

Making French Bread:


Step 1: The Dough Mixture – le fraisage (or frasage) 

1 cake (0.6 ounce) (20grams) fresh yeast or 1 package dry active yeast
1/3 cup (75ml) warm water, not over 100 degrees F/38C in a glass measure
3 1/2 cup (about 1 lb) (490 gr) all purpose flour, measured by scooping
dry measure cups into flour and sweeping off excess
2 1/4 tsp (12 gr) salt
1 1/4 cups (280 – 300ml) tepid water @ 70 – 74 degrees/21 – 23C

(Mary and Sara Note: if you are using instant yeast, you may reduce the amount to 1 3/4 tsp or 7 gr but you will still want to “proof” it because that is important for taste development in this bread) Stir the yeast in the 1/3 cup warm water and let liquefy completely while measuring flour into mixing bowl. When yeast has liquefied, pour it into the flour along with the salt and the rest of the water. Stir and cut the liquids into the flour with a rubber spatula, pressing firmly to form a dough and making sure that all the bits of flour and unmassed pieces are gathered in. Turn dough out onto kneading surface, scraping bowl clean. Dough will be soft and sticky. (Mary and Sara Note: Depending the humidity and temperature of your kitchen and the type of AP flour your use, you may need to add additional flour or water to the dough. To decide if this is necessary, we recommend stopping during the mixing process and push at your dough ball. If the dough is super sticky, add additional flour one handful at a time until the dough is slightly sticky and tacky but not dry. If the dough is dry and feels hard, add 1 Tbsp of water a time until the dough is soft and slightly sticky. Mary likes to keep a soup or cereal bowl of flour and a 1 cup measure of water with a tablespoon next to her mixer for this.) Turn dough out onto kneading surface, scraping bowl clean. Dough will be soft and sticky. Let the dough rest for 2 – 3 minutes while you wash and dry the bowl (and the dough hook if using a stand mixer).  

 Step 2: Kneading – petrissage
The flour will have absorbed the liquid during this short rest, and the dough will have a little more cohesion for the kneading that is about to begin. Use one hand only for kneading and keep the other clean to hold a pastry scrapper, to dip out extra flour, to answer the telephone, and so forth. Your object in kneading is to render the dough perfectly smooth and to work it sufficiently so that all the gluten molecules are moistened and joined together into an interlocking web. You cannot see this happen, of course, but you can feel it because the dough will become elastic and will retract into shape when you push it out.
Start kneading by lifting the near edge of the dough, using a pastry scraper or stiff wide spatula to help you if necessary, and flipping the dough over onto itself. Scrape dough off the surface and slap it down; lift edge and flip it over again, repeating the movement rapidly.In 2 -3 minutes the dough should have enough body so that you can give it a quick forward push with the heel of your hand as you flip it over. Continue to knead rapidly and vigorously in this way. If the dough remains too sticky, knead in a sprinkling of flour. The whole kneading process will take 5 – 10 minutes, depending on how expert you become.Shortly after this point, the dough should have developed enough elasticity so it draws back into shape when pushed, indicating the gluten molecules have united and are under tension like a thin web of rubber; the dough should also begin to clean itself off the kneading surface, although it will stick to your fingers if you hold a pinch of dough for more than a second or two. Let dough rest for 3 – 4 minutes. Knead by hand for a minute. The surface should now look smooth; the dough will be less sticky but will still remain soft. It is now ready for its first rise.

     Step 3: First Rising – pointage premier temps (3-5 hours at around 70 degrees)
You now have approximately 3 cups of dough that is to rise to 3 1/2 times its original volume, or to about 10 1/2 cups. Wash and fill the mixing bowl with 10 1/2 cups of tepid water (70 – 80 degrees) and make a mark to indicate that level on the outside of the bowl. Note, that the bowl should have fairly upright sides; if they are too outward slanting, the dough will have difficulty in rising. Pour out the water, dry the bowl, and place the dough in it (Mary and Sara Note: Very lightly grease the bowl with butter or kitchen spray as well to prevent the risen dough from sticking to the bowl).
Slip the bowl into a large plastic bag or cover with plastic, and top with a folded bath towel. Set on a wooden surface, marble or stone are too cold. Or on a folded towel or pillow, and let rise free from drafts anyplace where the temperature is around 70 degrees. If the room is too hot, set bowl in water and keep renewing water to maintain around 70 degrees. Dough should take at least 3 – 4 hours to rise to 10 1/2 cups. If temperature is lower than 70 degrees, it will simply take longer.(Mary and Sara Note: If your oven has an oven light, turn on the oven light when you start making the dough. By the time you are ready for the first rise, the temperature in your oven will be around 70 degrees. You can check with your oven thermometer. If you don’t have an oven light, like Mary, you can turn the oven on to its lowest setting about 5 minutes before you begin your rise. Leave on for 1 – 5 minutes until the temperature is around 75- 80 degrees. Turn off oven, when you open the door to put the dough in to rise, your oven will be around 70 degrees. Another trick is to put your dough on top of your hot water heater. Place a folded towel on top of the hot water heater and let rise. Also a heating pad works well. Mary also has used those give away shower caps from hotels to cover her bowls and the bowl covers for the metal mixing bowls work well too. Always lightly grease the plastic wrap or bowl cover so if the risen dough touches it, the dough won’t stick.) When fully risen, the dough will be humped into a slight dome, showing that the yeast is still active; it will be light and spongy when pressed. There will usually be some big bubbly blisters on the surface, and if you are using a glass bowl you will see bubbles through the glass.

Step 4: Deflating and Second Rising – rupture; pointage deuxieme temps (1 1/2 to 2 hours at around 70 degrees)
The dough is now ready to be deflated, which will release the yeast engendered gases and redistribute the yeast cells so that the dough will rise again and continue the fermentation process.
With a rubber spatula, dislodge dough from inside of bowl and turn out onto a lightly floured surface, scraping bowl clean. If dough seems damp and sweaty, sprinkle with a tablespoon of flour. Lightly flour the palms of your hands and flatten the dough firmly but not too roughly into a circle, deflating any gas bubbles by pinching them.Lift a corner of the near side and flip it down on the far side. Do the same with the left side, then the right side. Finally, lift the near side and tuck it just under the edge of the far side. The mass of dough will look like a rounded cushion. Slip the sides of your hands under the dough and return it to the bowl. Cover and let rise again, this time to not quite triple, but again until it is dome shaped and light and spongy when touched. (Mary and Sara Note: You may need to lightly re-grease your bowl and plastic wrap for the second rise to prevent sticking)

Step 5: Cutting and resting dough before forming loaves
Loosen dough all around inside of bowl and turn out onto a lightly floured surface. Because of its two long rises, the dough will have much more body. If it seems damp and sweaty, sprinkle lightly with flour.
Making clean, sure cuts with a large knife or a bench scraper, divide the dough into:

  • 3 equal pieces for long loaves (baguettes or batards)

After you have cut each piece, lift one end and flip it over onto the opposite end to fold the dough into two; place dough at far side of kneading surface. Cover loosely with a sheet of plastic and let rest for 5 minutes before forming. This relaxes the gluten enough for shaping but not long enough for dough to begin rising again. While the dough is resting, prepare the rising surface; smooth the canvas or linen towelling on a large tray or baking sheet, and rub flour thoroughly into the entire surface of the cloth to prevent the dough from sticking.

Step 6: Forming the loaves – la tourne; la mise en forme des patons

Because French bread stands free in the oven and is not baked in a pan, it has to be formed in such a way that the tension of the coagulated gluten cloak on the surface will hold the dough in shape.

 For Long Loaves – The Batard: (Baguettes are typically much too long for home ovens but the shaping method is the same)After the 3 pieces of dough have rested 5 minutes, form one piece at a time, keeping the remaining ones covered.Working rapidly, turn the dough upside down on a lightly floured kneading surface and pat it firmly but not too roughly into an 8 to 10 inch oval with the lightly floured palms of your hands. Deflate any gas bubbles in the dough by pinching them. Fold the dough in half lengthwise by bringing the far edge down over the near edge. Being sure that the working surface is always lightly floured so the dough will not stick and tear, which would break the lightly coagulated gluten cloak that is being formed, seal the edges of the dough together, your hands extended, thumbs out at right angles and touching. Roll the dough a quarter turn forward so the seal is on top. Flatten the dough again into an oval with the palms of your hands.Press a trench along the central length of the oval with the side of one hand. Fold in half again lengthwise.This time seal the edges together with the heel of one hand, and roll the dough a quarter of a turn toward you so the seal is on the bottom. Now, by rolling the dough back and forth with the palms of your hands, you will lengthen it into a sausage shape. Start in the middle, placing your right palm on the dough, and your left palm on top of your right hand. Roll the dough forward and backward rapidly, gradually sliding your hands towards the two ends as the dough lengthens. Deflate any gas blisters on the surface by pinching them. Repeat the rolling movement rapidly several times until the dough is 16 inches long, or whatever length will fit on your baking sheet. During the extension rolls, keep circumference of dough as even as possible and try to start each roll with the sealed side of the dough down, twisting the rope of dough to straighten the line of seal as necessary. If seal disappears, as it sometimes does with all purpose flour, do not worry.Place the shaped piece of dough, sealed side up, at one end of the flour rubbed canvas, leaving a free end of canvas 3 to 4 inches wide. The top will crust slightly as the dough rises; it is turned over for baking so the soft, smooth underside will be uppermost.Pinch a ridge 2 1/2 to 3 inches high in the canvas to make a trough, and a place for the next piece. Cover dough with plastic while you are forming the rest of the loaves.After all the pieces of dough are in place, brace the two sides of the canvas with long rolling pins, baking sheets or books, if the dough seems very soft and wants to spread out. Cover the dough loosely with flour rubbed dish towel or canvas, and a sheet of plastic. Proceed immediately to the final rising, next step.

Step 7: Final Rise – l’appret – 1 1/2 to 2 1/2 hours at around 70 degrees.The covered dough is now to rise until almost triple in volume; look carefully at its pre-risen size so that you will be able to judge correctly. It will be light and swollen when risen, but will still feel a little springy when pressed. It is important that the final rise take place where it is dry; if your kitchen is damp, hot, and steamy, let the bread rise in another room or dough will stick to the canvas and you will have difficulty getting it off and onto another baking sheet. It will turn into bread in the oven whatever happens, but you will have an easier time and a better loaf if you aim for ideal conditions.Preheat oven to 450 degrees about 30 minutes before estimated baking time.

Step 8: Unmolding risen dough onto baking sheet – le demoulage.
(Mary and Sara note: we are only going to describe the unmolding of The Batard but the unmolding process is the same no matter the shape of your loaf or loaves. The key to unmolding without deflating your bread is slow and gentle!) The 3 pieces of risen dough are now to be unmolded from the canvas and arranged upside down on the baking sheet. The reason for this reversal is that the present top of the dough has crusted over during its rise; the smooth, soft underside should be uppermost in the oven so that the dough can expand and allow the loaf its final puff of volume. For the unmolding you will need a non-sticking intermediate surface such as a stiff piece of cardboard or plywood sprinkled with cornmeal or pulverized pasta. Remove rolling pins or braces. Place the long side of the board at one side of the dough; pull the edge of the canvas to flatten it; then raise and flip the dough softly upside down onto the board. Dough is now lying along one edge of the unmolding board: rest this edge on the right side of a lightly buttered baking sheet. Gently dislodge dough onto baking sheet, keeping same side of the dough uppermost: this is the soft smooth side, which was underneath while dough rose on canvas. If necessary run sides of hands lightly down the length of the dough to straighten it. Unmold the next piece of dough the same way, placing it to the left of the first, leaving a 3 inch space. Unmold the final piece near the left side of the sheet.

Step 9: Slashing top of the dough – la coupe.
(Mary and Sara Note: We will only describe the slashing for the Batard here. All other slashes for the other shapes are described in Step 6: Forming the Loaves) The top of each piece of dough is now to be slashed in several places. This opens the covering cloak of gluten and allows a bulge of dough underneath to swell up through the cuts during the first 10 minutes of baking, making decorative patterns in the crust. These are done with a blade that cuts almost horizontally into the dough to a depth of less than half an inch. Start the cut at the middle of the blade, drawing toward you in a swift clean sweep. This is not quite as easy as it sounds, and you will probably make ragged cuts at first; never mind, you will improve with practice. Use an ordinary razor blade and slide one side of it into a cork for safety; or buy a barbers straight razor at a cutlery store. For a 16 to 18 inch loaf make 3 slashes. Note that those at the two ends go straight down the loaf but are slightly off centre, while the middle slash is at a slight angle between the two. Make the first cut at the far end, then the middle cut, and finally the third. Remember that the blade should lie almost parallel to the surface of the dough.

Step 10: Baking – about 25 minutes; oven preheated to 450 degrees (230 degrees C). As soon as the dough has been slashed, moisten the surface either by painting with a soft brush dipped in cold water, or with a fine spray atomizer, and slide the baking sheet onto rack in upper third of preheated oven. Rapidly paint or spray dough with cold water after 3 minutes, again in 3 minutes, and a final time 3 minutes later. Moistening the dough at this point helps the crust to brown and allows the yeast action to continue in the dough a little longer. The bread should be done in about 25 minutes; the crust will be crisp, and the bread will make a hollow sound when thumped.If you want the crust to shine, paint lightly with a brush dipped in cold water as soon as you slide the baking sheet out of oven.

Step 11: Cooling – 2 to 3 hours. (Mary and Sara Note: We know this will be the hardest thing to do for this challenge. But, if you do not let the French bread cool, the bread will be doughy and the crust will be soft. If you want to have warm French bread, re-heat the bread after it has cooled in a 400 degree oven, uncovered and directly on the oven rack for 10 – 12 minutes if it is unfrozen. If it has been frozen see the directions below) Cool the bread on a rack or set it upright in a basket or large bowl so that air can circulate freely around each piece. Although bread is always exciting to eat fresh from the oven, it will have a much better taste when the inside is thoroughly cool and has composed itself.

Step 12: Storing French bread Because it contains no fats or preservatives of any kind, French bread is at its best when eaten the day it is baked. It will keep for a day or two longer, wrapped airtight and refrigerated, but it will keep best if you freeze it – let the loaves cool first, then wrap airtight. To thaw, unwrap and place on a baking sheet in a cold oven; heat the oven to 400 degrees. In about 20 minutes the crust will be hot and crisp, and the bread thawed. The French, of course, never heat French bread except possibly on Monday, the baker’s holiday, when the bread is a day old.

Step 13: Canvas housekeeping
After each bread session, if you have used canvas, brush it thoroughly to remove all traces of flour and hang it out to dry before putting away. Otherwise the canvas could become mouldy and ruin your next batch of dough.
 

The Simulated Bakers’ Oven Baking in the ordinary way, as described in the preceding recipe, produces an acceptable loaf of bread but does not nearly approach the glory you can achieve when you turn your home oven into a baker’s oven. Merely providing yourself with the proper amount of steam, if you can do nothing else, will vastly improve the crust, the color, the slash patterns, and the volume of your bread; steam is only a matter of plopping a heated brick or stone into a pan of water in the bottom of the oven. The second provision is a hot surface upon which the naked dough can bake; this gives that added push of volume that improves both the appearance and the slash patterns. When you have the hot baking surface, you will then also need a paddle or board upon which you can transfer dough from canvas to hot baking surface. For the complete set up here is you should have, and any building-supply store stocks these items.For the hot baking surface: Metal will not do as a hot baking surface because it burns the bottom of the dough. The most practical and easily obtainable substance is ordinary red floor tiles 1/4” thick. They come in various sizes such as 6 x 6, 6 x 3, and you only need enough to line the surface of an oven rack. Look them up under Tiles in your Directory, and ask for “quarry tiles” their official name. (Mary and Sara Note: When this book was written, quarry tiles had a fair amount of asbestos in them. Today, in North America and Europe, they normally are made of clay. Make sure if you decide to go purchase some quarry tiles you only purchase unglazed quarry tiles because most of the glazes used contain lead or some other nasty substance that could get transferred. A large pizza stone will also work but make sure it is at least 1/4 inch thick because the thinner ones can break when used at the high heats that baking bread requires. Make sure you never put wet tiles in the oven because they can shatter or worse as the oven heats up.) For unmolding the risen dough from its canvas: A piece of 3/16 inch plywood about 20 inches wide. For sliding the dough onto the hot tiles: When you are doing 3 long loaves, you must slide them together onto the hot tiles; to do so you unmold them one at a time with one board and arrange them side by side on the second board, which takes place on the baker’s paddle, la pelle. Buy a piece of plywood slightly longer but 2 inches narrower than your oven rack.(Mary and Sara note: Today, you can buy a real baker’s paddle easily online or at a restaurant supply store for about the same money as a piece of plywood and it will have a bevelled edge that will make sliding loaves in and out of the oven easier)To prevent dough from sticking to unmolding and sliding boards: White cornmeal or small dried pasta pulverized in the electric blender until it is the consistency of table salt. This is called fleurage.The steam contraption: Something that you can heat to sizzling hot on top of the stove and then slide into a pan of water in the oven to make a great burst of steam: a brick, a solid 10lb rock, piece of cast iron or other metal. A 9 x 12 inch roasting pan 2 inches deep to hold an inch of water and the hot brick. (Mary and Sara note: Other ways to get steam in the oven is pre-heat the oven and then to fill a pan with ice cubes put it on the lower rack and then pour warm water into the pan. The temperature difference between the ice cubes and the warm water will create steam. Also you can toss ice cubes on the bottom of the oven. Put a metal baking sheet on the bottom rack, pre-heat the oven with the baking sheet in the oven and right before you put your loaves in, spritz water onto the pan.)


french-bread11.jpg

Bruno’s baking notes:

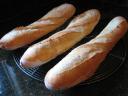
This is by far the best baguette recipe I’ve tried, but also the most labor intensive. Brushing the loaves w/ water definitely gave them a nice finish. I also think I’ve finally learned to dock baguettes correctly – three’s the charm!

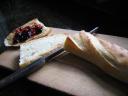
P.S.  – The picture above is one of my favorite breakfasts: toasted bread w/ peanut butter and preserves – it’s especially good if the bread is homemade!!

Cheers…

Bruno
Biscotti Anyone?

biscotti6.jpgbiscotti1.jpgbiscotti7.jpg

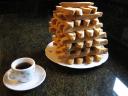
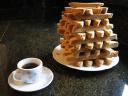
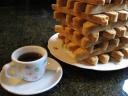
This biscotti recipe is from Acquerello  – the restaurant in San Francisco where I did my externship for school. I used to make 3 large batches per week. The waiters would bring them out to customers along w/ their check… I guess it made the price of the meal more palatable (ha!).  I reduced the original recipe by 3/4ths – I also substituted the lemon zest w/ orange zest and used hazelnuts instead of sliced almonds (I forgot to add the nuts to the batter for this batch… oh well, there’s always next time, but I was so looking forward to the crunchiness and flavor of the hazelnuts!) By the way, if you’re wondering, yes, I did eat the whole plateful of biscotti (not!).

 This biscotti recipe is from Acquerello  – the restaurant in San Francisco where I did my externship for school. I used to make 3 large batches per week. The waiters would bring them out to customers along w/ their check… I guess it made the price of the meal more palatable (ha!).  I reduced the original recipe by 3/4ths – I also substituted the lemon zest w/ orange zest and used hazelnuts instead of sliced almonds (I forgot to add the nuts to the batter for this batch… oh well, there’s always next time, but I was so looking forward to the crunchiness and flavor of the hazelnuts!) By the way, if you’re wondering, yes, I did eat the whole plateful of biscotti (not!).

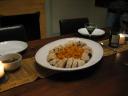
Side note: The plate in the photos is over 300 years old. According to my dad it (along w/ the rest of a set of dishes) was one the few of his belongings that survived the bombings in Milan, Italy during World War II. The apartment building he lived in was destroyed, but the dishes were in the sub-basement and miraculously didn’t get broken! If you zoom in you can see the hand-painted flowers on the plate. The artist also painted flower buds over any small defects in the porcelain.

Biscotti

Ingredients:

1/2 pound butter

3 ounces almond paste

2 cups sugar

zest of 1 orange

4 eggs

4 cups flour

1 teaspoon baking powder

1 teaspoon baking soda

1 teaspoon salt

1 tablespoon vanilla extract

1 1/2 cups hazelnuts (whole)

Procedure:

1) Combine butter, sugar, almond paste, and vanilla in food processor and cream until smooth.

2) Place eggs into a bowl and add orange zest, reserve.

3) Combine all other dry ingredients (except hazelnuts) in a large bowl and sift. Place hazelnuts into sifted ingredients and reserve.

4) After creaming of sugar and butter is complete, add eggs and orange zest and continue mixing until all combined. (It should look like a breaking sauce)

5) Add all the dry ingredients and mix until dough just comes together. Test texture of dough – if too dry add another egg, if too wet add a bit more flour.

6) Preheat oven to 350 degrees F.

7) Remove dough from processor and place onto a lightly floured surface. Work dough lightly into a brick and cut in half. Roll out both pieces into round logs about 12 inches in length - add flour to surface as needed to keep logs from sticking (the dough is loose and sticky so having flour on your hands will help during this step).

8) Place logs onto parchment paper lined sheet pans that have been sprayed w/ oil to keep parchment paper in place (one log per pan if using half sheet pans).

9) Place sheet pans in oven and bake for 30 – 35 minutes or until golden brown. Rotate pans top to bottom and back to front about halfway through for even baking.

10) Remove pans from oven and let biscotti cool  (about 10 minutes) until sturdy enough to slice 1/2 thick. (Reduce oven temperature to 300 degrees at this time)

11) Place slices back onto sheet pans and bake for an additional 20 – 25 minutes until biscotti are just starting to brown (be careful to not over bake at this stage or biscotti will become too hard). Rotate pans again during this second baking.

12) Remove pans from oven and allow biscotti to cool completely before storing in an airtight container.

13) Enjoy your fresh biscotti w/ coffee or tea while visiting w/ friends, and remember to bring them some for snacking on later!

Yield: Approx. 46 biscotti

Ciao…

Bruno

Vegetable Soup for the Soul (w/ Chicken & Rice)

soup4.jpgsoup5.jpgsoup2.jpg

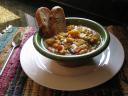
I’ve been sick, so I decided making soup would help cure what’s been ailing me. I was craving veggie soup, went to the store for fresh produce and threw this together. It made the house smell so good, and tasted equally delicious! Then I thought, “write the recipe down and share it”. Sometimes my best recipes start as a whim… this is one of them!! I hope you enjoy it as much as I have the last couple of days.

Vegetable Soup w/ Chicken and Rice

Ingredients:

3 arbol chiles – crumbled

2 branches dry rosemary – leaves only

1 teaspoon dry oregano

10 dry sage leaves – crumbled

6 branches dry thyme – leaves only

2 bay leaves

2 ears corn  – slice kernels from ears

1 bunch Swiss chard – stems cut in 3/4 inch pieces and leaves cut in 1 inch pieces

4 carrots – peeled, split in half lengthwise and cut in 3/4 inch pieces

1 medium butternut squash – peeled, seeded and cut in 3/4 inch pieces

1/2 red onion – peeled and cut in 1/2 inch dice

4 garlic cloves – peeled and sliced

1/2 pint cooked rice

1 whole boneless, skinless chicken breast – cut in 1/2 inch cubes

3 leeks (white part only) – cut in 3/4 inch pieces

1 cup crimini mushrooms – sliced

1 1/2 cups tomato – cut in 1/2 inch dice

1 quart veggie stock

1 quart water

1/2 + 1/2 tablespoons olive oil

salt and pepper to taste

Procedure:

1) Add 1/2 tablespoon olive oil to a large pot and sweat the squash, leek, chard stems, mushrooms, onions, garlic, and carrots for 10 to 15 minutes over low heat

2) Stir in the herbs and chile

3) Add the tomato, corn, stock and water – stir to combine

4) Simmer for 45 minutes, uncovered, over medium heat

5) Meanwhile, add remaining 1/2 tablespoon olive oil to a large saute pan and saute the chicken over medium high heat until just cooked through – season w/ salt and pepper

6) Add chard leaves, chicken and rice to soup pot and simmer for an additional 15 minutes – taste and add more salt if needed

7) Eat!!

P. S. – If you’re a vegetarian, just omit the chicken, and voila…  you’ll have a wonderful vegetarian meal!

To your health…

Bruno

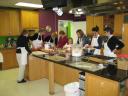
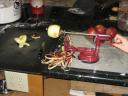
St. Louis Food Bloggers Workshop (Apple Pie and Search Engine Optimization)

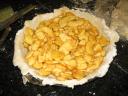
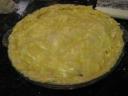
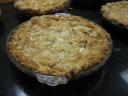
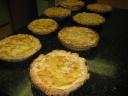
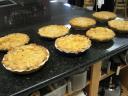
On Sunday I joined several St. Louis area food bloggers for a workshop at The Kitchen Conservatory to learn how to make a double crusted apple pie. Anne Cori was our instructor. She emphasized “cold dough/hot oven” to create a perfect pie. While the pies baked, Christi Fentress of Response Builders presented us w/ information on search engine optimization (i.e., how to set up your site so it gets optimal placement on search engines such as Google, Yahoo and MSN). Many thanks to Anne and Christi for sharing their knowledge. Also, thanks to Alanna at A Veggie Venture for organizing this fun event!

 I took my pie to share w/ some friends while it was still warm from the oven. The pie may not be the prettiest I’ve seen, but it was the best apple pie I’ve tasted so far (the crust was super tender and flaky)!! My friends both thought so too… in fact one of them inhaled 3 slices of pie that evening!

I’m too lazy to type out the recipes right now but you can find them here (crust) and here (pie)  if you’re interested.

Some photos for your viewing pleasure (click photos to zoom in).

workshop1.jpgworkshop2.jpgworkshop3.jpg

workshop4.jpgworkshop5.jpgworkshop6.jpg

workshop7.jpgworkshop8.jpgworkshop9.jpg

That’s all folks…

Bruno

The West Coast Tour – Seattle and Napa Valley

It’s 2008, I’ve got the blues, and I’ve lost my cooking mojo! I’m going to a pie making workshop on Sunday so maybe that will help inspire me.  

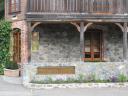
Until then, here are some photos from my last work week. I got some great shots of the Seattle skyline but unfortunately we didn’t get to spend any time there. We did however get to spend a few hours in Napa Valley. It was torture going to wine country and not being able to taste any wine! (we were on duty) Thankfully we had the opportunity to eat a nice meal at Mustards Grill and stop by the French Laundry in Yountville to take a look around. I was able to go in the kitchen because the restaurant was closed for a few days for a tune-up. We also had time for a short visit to Copia (the center for wine, food and the arts) in the city of Napa.  

Enjoy the views! (click on photos to zoom in)

mount-rainier.jpgseattle3.jpgseattle2.jpg

Mount Rainier; Seattle skyline

mustards1.jpgmustards2.jpgmustards3.jpg

Mustards Grill

mustards5.jpgmustards-larry-and-kim.jpgmustards9.jpg

 Mustards menu; Larry & Kim (the pilots); Kim & me

mustards7.jpgmustards6.jpgmustards8.jpg

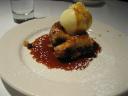
hanger steak; seafood tostada; cherry & pear bread pudding

napa1.jpgnapa3.jpgnapa2.jpg

Napa Valley scenery

yountville1.jpgyountville2.jpgfrench-laundry2.jpg

entering Yountville; The French Laundry

french-laundry1.jpgfrench-laundry3.jpgfrench-laundry7.jpg

more of The French Laundry

french-laundry6.jpgfrench-laundry5.jpgfrench-laundry4.jpg

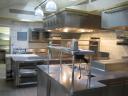
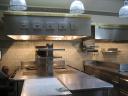
inside the kitchen

copia1.jpgcopia2.jpgcopia3.jpg

Copia

Until next time…

 Bruno

Sourdough Baguettes for the Holidays

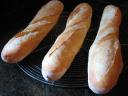
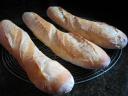
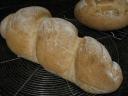
holiday-baguettes3.jpgholiday-baguettes1.jpgholiday-baguettes2.jpg

Hi everyone,

 Here’s a recipe that I put together for baguettes using sourdough starter. I couldn’t find any simple recipes for sourdough baguettes when I did a web search, so I combined a couple of recipes, took a chance and voila… it succeeded! I took these over to my friend’s house to share at the delicious Christmas feast that was prepared yesterday.

Sourdough Baguettes

Ingredients:

2 1/2 cups bread flour

2 1/4 teaspoons salt

2 cups active sourdough starter

1 cup cool water

corn meal for dusting sheet pan

Procedure:

1) In a large bowl mix together the flour, salt, starter and water

2)  Remove mixture from bowl and knead for 8 minutes on a floured surface

3) Put dough back into the bowl, cover w/ plastic wrap and bulk ferment at room temperature for 90 minutes

4) Weigh dough into 3 equal portions then shape into tight balls, cover w/ plastic wrap and let bench rest for 1 hour

5) Shape into 14 inch baguettes by rolling from the center out using the palms of your hands

6) Lightly dust baguettes w/ some flour and place them on a parchment paper lined sheet pan that is generously dusted w/ corn meal

7) Cover w/ plastic wrap and place in refrigerator overnight

8) Let stand at room temperature for 1 1/2 hours prior to baking (since it is winter here and my kitchen is cool, I placed the baguettes in the unheated oven w/ the light on to give them some warmth)

9) Preheat oven to 425 degrees F

10) Dust baguettes w/ flour and dock w/ a serrated knife  – hold knife at a 30 degree angle and make 4 or 5 diagonal cuts

11) Place a container of hot water at the bottom of the oven

12) Place baguettes in oven on middle rack and bake for 25 minutes or until golden brown  – – quickly pour 1/2 cup of water onto the bottom sides of the oven right after placing baguettes in

13) After 1 minute quickly pour in another 1/2 cup of water – repeat once again 2 minutes later (the steam helps promote the “oven spring” and crust gloss)

14) Remove baguettes from oven and let cool

15) Share the bread w/ your friends!

**  yields 3 baguettes

 I hope everyone is having an enjoyable holiday season! If you’re feeling stressed, I recommend breaking away from the holiday hustle-bustle, slowing down to relax, bake this bread, break out a nice bottle of wine and some cheese and sit down w/ some of your favorite friends to enjoy a peaceful moment together. That’s what I did and I feel so much better!!

Happy holidays to all… see you in 2008!!

 Bruno

Potato Bread w/ Rosemary & Roasted Garlic

 daring-bakers.jpg

Daring Bakers Challenge for November hosted by Tanna at My Kitchen In Half Cups


  potato-bread3.jpgpotato-bread4.jpgpotato-bread1.jpg


Tender Potato Bread (recipe from Home Baking: The Artful Mix of Flour & Tradition Around the World by Jeffrey Alford and Naomi Duguid)


Ingredients:

4 medium to large floury (baking) potatoes, peeled and cut into chunks.
Tanna Note: For the beginner bread baker I suggest no more than 8 ounces of potato; for the more advanced no more than 16 ounces. The variety of potatoes you might want to use would include Idaho, Russet & Yukon gold, there are others.

4 cups(950 ml) water, reserve cooking water
1 tablespoon plus 1 teaspoon salt
2 teaspoons active dry yeast
6 ½ cups to 8 ½ cups (1 kg to 1350g) unbleached all-purpose
1 tablespoon unsalted butter, softened
1 cup (130g) whole wheat flour

7 garlic cloves – chopped and roasted

2 sprigs fresh rosemary – finely chopped

Making the Dough (Directions will be for making by hand):

Put the potatoes and 4 cups water in a sauce pan and bring to boil. Add 1 teaspoon salt and cook, half covered, until the potatoes are very tender. Drain the potatoes, SAVE THE POTATO WATER, and mash the potatoes well. Tanna Note: I have a food mill I will run my potatoes through to mash them. Measure out 3 cups(750ml) of the reserved potato water. Add extra water if needed to make 3 cups. Place the water and mashed potatoes in the bowl you plan to mix the bread dough in. Let cool to lukewarm (70-80°F/21 – 29°C) – stir well before testing the temperature – it should feel barely warm to your hand. You should be able to submerge you hand in the mix and not be uncomfortable.Add yeast to 2 cups all-purpose flour and whisk. Add yeast and flour to the cooled mashed potatoes & water and mix well. Allow to rest/sit 5 minutes.Note about Adding Yeast: If using Active Dry Yeast or Fresh yeast, mix & stir yeast into cooled water and mashed potatoes & water and let stand 5 minutes. Then add 2 cups of flour to the yeast mix and allow to rest several minutes. If using Instant Dry Yeast, add yeast to 2 cups all-purpose flour and whisk. Add yeast and flour to the cooled mashed potatoes & water and mix well. Allow to rest/sit 5 minutes.Sprinkle in the remaining 1 tablespoon salt and the softened butter; mix well. Add the 1 cup whole wheat flour, stir briefly.Add 2 cups of the unbleached all-purpose flour and stir until all the flour has been incorporated.


Tanna Note: At this point you have used 4 cups of the possible 8 ½ cups suggested by the recipe.
Turn the dough out onto a generously floured surface and knead for about 10 minutes, incorporating flour as needed to prevent sticking. The dough will be very sticky to begin with, but as it takes up more flour from the kneading surface, it will become easier to handle; use a dough scraper to keep your surface clean. The kneaded dough will still be very soft. Place the dough in a large clean bowl or your rising container of choice, cover with plastic wrap or lid, and let rise about 2 hours or until doubled in volume.Turn the dough out onto a well-floured surface and knead gently several minutes. It will be moist and a little sticky.

Forming the Bread:
Tanna Note: It is at this point you are requested to Unleash the Daring Baker within. The following is as the recipe is written. You are now free to follow as written or push it to a new level.

Divide the dough into 2 unequal pieces in a proportion of one-third and two-thirds (one will be twice as large as the other). Place the smaller piece to one side and cover loosely.

To shape the large loaf:
Butter a 9 x 5 x 2.5 inch loaf/bread pan. Flatten the larger piece of dough on the floured surface to an approximate 12 x 8 inch oval, then roll it up from a narrow end to form a loaf. Pinch the seam closed and gently place seam side down in the buttered pan. The dough should come about three-quarters of the way up the sides of the pan. Cover with plastic wrap and let rise for 35 to 45 minutes, until puffy and almost doubled in volume.

To make a small loaf with the remainder:
Butter an 8x4X2 inch bread pan. Shape and proof the loaf the same way as the large loaf.
To make rolls:
Butter a 13 x 9 inch sheet cake pan or a shallow cake pan. Cut the dough into 12 equal pieces. Shape each into a ball under the palm of your floured hand and place on the baking sheet, leaving 1/2 inch between the balls. Cover with plastic wrap and let rise for about 35 minutes, until puffy and almost doubled.

To make focaccia:
Flatten out the dough to a rectangle about 10 x 15 inches with your palms and fingertips. Tear off a piece of parchment paper or wax paper a little longer than the dough and dust it generously with flour. Transfer the focaccia to the paper. Brush the top of the dough generously with olive oil, sprinkle on a little coarse sea salt, as well as some rosemary leaves, if you wish and then finally dimple all over with your fingertips. Cover with plastic and let rise for 20 minutes.

Baking the bread(s):

Note about baking order: bake the flat-bread before you bake the loaf; bake the rolls at the same time as the loaf.Note about Baking Temps: I believe that 450°F(230°C) is going to prove to be too hot for the either the large or small loaf of bread for the entire 40/50 minutes. I am going to put the loaves in at 450°(230°C) for 10 minutes and then turn the oven down to 375°F (190 °C) for the remaining time.Note about cooling times: Let all the breads cool on a rack for at least 30 minutes before slicing. Rolls can be served warm or at room temperature.

For loaves and rolls:
Dust risen loaves and rolls with a little all-purpose flour or lightly brush the tops with a little melted butter or olive oil (the butter will give a golden/browned crust). Slash loaves crosswise two or three times with a razor blade or very sharp knife and immediately place on the stone, tiles or baking sheet in the oven. Place the rolls next to the loaf in the oven.
Bake rolls until golden, about 30 minutes. Bake the small loaf for about 40 minutes. Bake the large loaf for about 50 minutes.Transfer the rolls to a rack when done to cool. When the loaf or loaves have baked for the specified time, remove from the pans and place back on the stone, tiles or baking sheet for another 5 to 10 minutes. The corners should be firm when pinched and the bread should sound hollow when tapped on the bottom.

For foccaia:
Place a baking stone or unglazed quarry tiles, if you have them, if not use a no edged baking/sheet (you want to be able to slide the shaped dough on the parchment paper onto the stone or baking sheet and an edge complicates things). Place the stone or cookie sheet on a rack in the center of the oven and preheat to 450°F/230°C.
If making foccacia, just before baking, dimple the bread all over again with your fingertips. Leaving it on the paper, transfer to the hot baking stone, tiles or baking sheet. Bake until golden, about 10 minutes. Transfer to a rack (remove paper) and let cool at least 10 minutes before serving.

Bruno’s baking notes:

I baked the large loaf for 55 minutes on a sheet pan, and the small loaf for 50 minutes on a pizza stone.

This bread was deliciously moist from the potato in the dough, with a fantastically crunchy crust! I’ve never made potato bread before but I will definitely bake some again. The only thing I will do differently next time is add more rosemary and roasted garlic to the dough. This batch only whispered of rosemary and garlic rather than roared. Practice makes perfect!

 May the yeast be w/ you…

Cheers!

Bruno

Spiced Caramel Apple Gelato

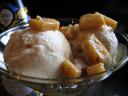
 caramel-apple-gelato1.jpgbeaujolais-nouveau-2007.jpgcaramel-apple-gelato3.jpg

This was my contribution to the Thanksgiving feast at my friends’ house. I also brought a bottle of 2007 Georges DuBoeuf Beaujolais Nouveau that was “tender, fruity, harmonious, elegant, fresh and delicious.”

The gelato was a success. My friends liked this flavor better than the pumpkin gelato I brought last year. The caramel ended up clumping at the bottom during the churning process and what didn’t clump was incorporated into the mixture. I removed the clump of caramel when I was pouring the finished product into the container. The gelato was nevertheless delicious. Next time I will stir in the caramel sauce at the very end, after the finished product has been pour into its container. Hopefully this will give me the result I was trying to achieve – a nice caramel swirl!

Spiced Caramel Apple Gelato

Ingredients:

6 cardamom pods – crushed

1 teaspoon Penzy’s cake spice

6 egg yolks

1 cup sugar

1 quart half & half

1/2 cup unsalted roasted pistachios – shelled and skins removed

1 1/4 cups Granny Smith apples cut into 1/2 inch dice, lightly sauteed in butter w/ a dusting of cinnamon, brown sugar and the juice of half a lime

caramel sauce (see recipe below) 

Procedure:

1) In medium saucepan heat half  & half gently to a simmer w/ cardamom and cake spice, then turn off heat and let mixture steep for 15 minutes; reheat and pass through a fine mesh strainer prior to adding to egg yolks/sugar

2) In medium size mixing bowl combine egg yolks and sugar and beat together until pale yellow

3) Beat 2 tablespoons of the warm half  & half into the egg mixture (do this slowly to avoid curdling the eggs), then beat in the remaining half  & half little by little

4) Place bowl over a pot of simmering water and cook over a gentle heat, stirring constantly, until the mixture coats the back of a spoon (do not let temperature exceed 170 degrees F or mixture will start to curdle)

5) Cool in an ice bath and chill for at least 4 hours in fridge

6) Churn in ice cream maker according to manufacturer’s instructions, adding the pistachios, apples and 3/4 of the caramel sauce two thirds of the way through the churning process

7) Transfer gelato to a 2 quart plastic container, quickly stir to evenly distribute the apples and nuts, cover top w/ parchment paper cut to size (this will reduce air exposure and prevent ice crystals from forming on the surface of gelato), and freeze until firm

Yield: Approx. 1 ½ quarts

Caramel Sauce (recipe adapted from Food & Wine)

Ingredients:
1/4 cup dark rum
1/2 cup raisins
1 1/2 cups sugar
1/4 cup water
1/2 cup whipping cream
 
Procedure:
In a small bowl, soak the raisins in the rum.
In a heavy medium saucepan, combine the sugar and water and cook over moderate heat until a deep amber caramel forms. Remove from the heat. Slowly and carefully add a little of the whipping cream to stop the cooking. Add the remaining whipping cream and stir in the raisins and rum.

I hope everyone reading this post had as fantastic of a Thanksgiving Day as I did!

Ciao…

Bruno

Bread and Wine (Sourdough & London Cab)

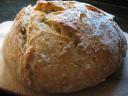
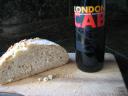
bread-and-wine2.jpgbread-and-wine3.jpg

This is what they served me the last time I was in jail. A big improvement over the time before that when all I got was stale bread and water! Of course this was a jail just outside of Napa Valley, California…

If you believe that, I have some nice swamp land for sale too :-)

Actually, Karen, a fellow St. Louis food blogger at Familystyle Food was kind enough to share her sourdough starter w/ me, so I decided to try my hand at making some sourdough bread. I had intended to make the bread for World Bread Day 2007 hosted by Kochtopf but I missed the deadline. Oh well, better late than never! 

The wine is one that I’ve been wanting to do a post on because it is very good and not outrageously expensive like some California cabernets can be.

 Notes on London Cab:

2003 London Cab


You never know what to expect. But boy, what a ride! A little wild, a little reckless, and a whole lotta red. This cab starts off slow and easy, but revs up into a fun, full-bodied, fruit-driven wine in no time. Flavorfully rich, cherry red, and oh-so-berry, it’s nothing short of ready for action, and one of the greatest finds in all of old country . . . and new, for that matter.

Varietals: 100% estate-grown Cabernet Sauvignon

Appellation: Russian River Valley

pH: 3.56     TA: .484     Brix: 24

Oak: French

Alcohol: 13.8%

Production: 1300 cases

Vinted & bottled by Chateau Felice Winery

NO-KNEAD SOURDOUGH (recipe courtesy of Sourdoughs International)

After Mark Bittman’s feature in the New York Times (November 8, 2006) on Jim Lahey’s no-knead bread, I received many inquires asking if it is possible to make no-knead sourdough. It took just one look at Lahey’s recipe to focus on the 12 hour “rest”. It seemed pretty obvious.  Lactobacilli in a sourdough culture “fermenting” for 12 hours should produce a far better flavor than ¼ teaspoon of instant yeast and no lactobacilli. It is only necessary to modify the recipe for the extra flour and water added by the sourdough culture.  Here’s what it looks like.

Recipe (see note)
Produces one 1½ pound loaf
1 cup fully active sourdough culture
440 grams (3 cups) all-purpose or bread flour, more for dusting
1 cup water
1½ teaspoons salt

  1. In a large bowl briefly combine sourdough culture, flour, water and salt. The consistency should be very firm and shaggy. Cover bowl with plastic wrap and proof 12-18 hours at about 70° F. At 70-75 degrees the bread leavens well and has the distinct sourness and flavor of sourdough.  At more than 75 degrees the dough becomes too acidic which inhibits the wild yeast and leavens poorly. At much less than 70 degrees the dough leavens well but has a mild flavor.
     
  2. After the 12-18 hour fermentation this is very sticky dough. Use a plastic spatula to ease it away from the edges of the bowl onto a lightly floured board.  Sprinkle the surface with additional flour and let the dough rest 15 minutes or so.
     
  3. With minimal handling and additional flour (not more than ¼ cup) form a ball which is placed directly in the baking container to rise (or placed between cotton cloths as described by Lahey) and proofed until ready to bake, double in bulk (about 4 hours).  The baking container can be almost any small covered pot (avoid willow baskets since the sticky dough is difficult to remove).
     
  4. Lahey bakes the dough in an oven and container both preheated to 450° for approximately 1 hour. To obtain better oven spring place the risen dough in its container in a cool oven, set the oven at 450°, turn it on and bake for approximately 1 hour and 10 minutes.  You will never knead a better sourdough!

Note:  In developing the above recipe, I used our Original San Francisco culture. There are several additional recipes for no-knead sourdoughs in the section on batter breads in Classic Sourdoughs.

** The bread is one of the best I’ve baked. The crust and crumb were fantastic, and Karen’s homemade sourdough starter added such a great flavor to the end product! I highly recommend this recipe. The only thing I will do differently next time is doing the rise in the baking container as suggested. I let my bread rise in a seperate bowl and it was difficult to transfer to the preheated dutch oven.

I hope you give this bread and wine a try!

Until next time…

Bruno