pornjk, pornsam, xpornplease, joyporn, pornpk, foxporn, porncuze, porn110, porn120, oiporn, pornthx, blueporn, roxporn, silverporn, porn700, porn10, porn40, porn900

Author Archive for brunosdreamPage 14 of 29

Thanksgiving 2011

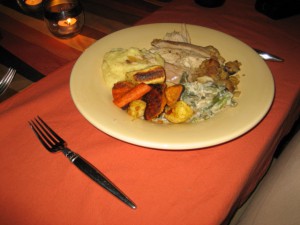
I hope everyone had a delicious and relaxing Thanksgiving w/ family and friends. I know I did thanks to my friends Michelle and Byron! Michelle cooked up a feast of turkey, roasted root veggies, green bean casserole, stuffing and gravy. For dessert we had pumpkin pie and my gelato. Michelle made the turkey using a new technique of cooking the turkey the day before, carving it, then placing it back in the roasting pan w/ the cooking juices to be reheated the next day. Not only was it tender and juicy, it saves a ton of time on the day of Thanksgiving!

I snapped a few pics of the feast in between bites…

Thanksgiving1 2011

Byron, Mackenzie, Michelle  and Dave

Thanksgiving2 2011

My plate of goodies

Thanksgiving3 2011

Kaiko waiting for stuff to fall off the table

Thanksgiving5 2011

After the goodness


Thanks again for your hospitality Byron and Michelle!!

Bruno

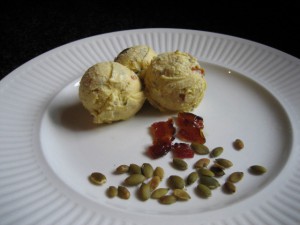
Pumpkin & Acorn Squash Gelato w/ Roasted Pumpkin Seeds and Candied Bacon

Pumpkin & Acorn Squash Gelato

This is what I’m bringing as my contribution to the Thanksgiving feast that I attend at one of my friends’ house this year (no official invitation yet). I’ll also be taking along a bottle of Beaujolais Nouveau.

I’ve tried dark chocolate w/ bits of bacon in it and really liked the flavor combination. I wasn’t sure about putting bacon in this gelato flavor but figured if I sweetened the salty bacon by candying it, the end result might work. Well, after I finished my photo session I had to sample the product just in case it was a losing recipe. I ate what you see in the photo above and I must say it actually was pretty tasty! I hope my friends think so too!!

Pumpkin & Acorn Squash Gelato w/ Roasted Pumpkin Seeds and Candied Bacon 

Ingredients:

2 cups pumpkin and acorn squash puree (I used 1 cup of each)

1 cup sugar (plus 1/2 cup for candying bacon)

6 egg yolks

1 quart half & half

1/2 cup unsalted pumpkin seeds

6 slices thick cut applewood smoked bacon

Procedure:

** click the following link to a previous post for instructions on how to roast pumpkin/squash and on candying; click here

 1) In a metal bowl, whisk egg yolks and sugar until mixture becomes smooth and pale yellow

2) Place half & half in a heavy pot and heat until scalded

3) Very slowly whisk half & half into egg/sugar mixture so as not to curdle the mixture

4) Place bowl w/ mixture over a pot of simmering water, stirring continuously w/ a heat resistant spatula until mixture coats the back of a metal spoon (do not let mixture exceed 170 degrees F to prevent curdling), then quickly place bowl in an ice bath to stop the cooking process and promote rapid cooling

5) In a food processor, pulse in 3 cups of the gelato mixture to the pumpkin/squash puree to thin, then stir puree into the remaining gelato mixture, blending well, and chill in fridge for at least 4 hours or overnight 

6) Cook bacon (not too crispy), remove excess grease w/ paper towels, cut into 1/2 inch squares, then candy and break into 1/2 inch squares

7) Roast pumpkin seeds and let cool

8) Churn mixture in ice cream maker according to manufacturer’s instructions adding the roasted pumpkin seeds and candied bacon when mixture starts to freeze

9) Pour gelato into a 2 quart plastic container, stir to evenly distribute pumpkin seeds and candied bacon, then place a piece of parchment paper cut to size on the surface of gelato (this will reduce air exposure and prevent ice crystals from forming on the surface of the gelato), seal container and freeze until firm 

Yield: Approx. 1 1/2 quarts 


I hope you have a wonderful Thanksgiving meal w/ great friends and family. Remember, it’s Thanksgiving so eat as much as you want… you can work the extra pounds off later:-)

Bon appetit!!

Bruno


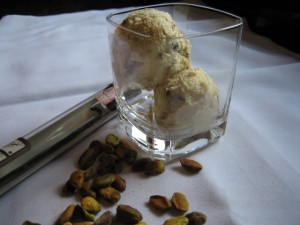
Madagascar Vanilla Bean Gelato w/ Candied Pistachios

vanilla gelato with candied pistachios10

I ran this new flavor by my tasting panel (i.e., some  friends) and the consensus was YUM… especially the candied pistachios which were surrounded by a deep caramelized sugar flavor and crunchiness. I must agree, those candied pistachios were so over the top good it was hard for me to stop snacking on them while I was churning up the gelato :-) 

Madagascar Vanilla Bean Gelato w/ Candied Pistachios

Ingredients:

1 cup shelled unsalted pistachios

6 egg yolks

1  Madagascar vanilla bean

1 quart half & half

1 cup sugar, plus 1/2 cup sugar for candying pistachios

Procedure:

1) Candy pistachios and let cool

2) In a metal bowl, whisk egg yolks and sugar until mixture becomes smooth and pale yellow

3) Place half & half in a heavy pot; slit vanilla bean lengthwise, scrape seeds into half  & half  and place bean in too, then  heat until scalded removing bean when done

4) Very slowly whisk half & half into egg/sugar mixture so as not to curdle the mixture

5) Place bowl w/ mixture over a pot of simmering water, stirring continuously w/ a heat resistant spatula until mixture coats the back of a metal spoon (do not let mixture exceed 170 degrees F to prevent curdling), then quickly place bowl in an ice bath to stop the cooking process and promote rapid cooling

6) Once cool, refrigerate mixture for at least 4 hours or overnight

7) Churn mixture in ice cream maker according to manufacturer’s instructions

8) While mixture is churning, coarsely chop candied pistachios

9) Pour gelato into a 2 quart plastic container, stir in candied pistachios (making sure they are distributed evenly throughout the mix) then place a piece of parchment paper cut to size on the surface of gelato (this will reduce air exposure and prevent ice crystals from forming on the surface of the gelato), seal container and freeze until firm 

Yield: Approx. 1 1/2 quarts 

Enjoy!

Bruno

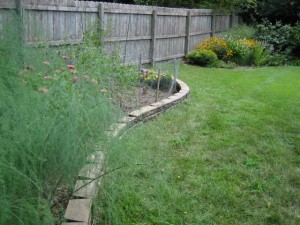
Veggie Garden 2011 Update #2

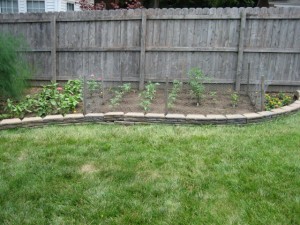
Here it is mid-September and I hardly have anything to show for all the hard work put into this year’s garden. It’s been a very disappointing year in terms of garden bounty. Despite all the extra feeding and watering I’ve done, the extreme heat and extra dry conditions in St. Louis this year have done considerable damage. Flowers dropped off  and fruit didn’t set in mid-summer. Now fruit is finally forming but it’s getting cool and wet. Out of the four years I’ve put in a veggie garden this is by far the worst year for yield. Even my herb garden has been effected by the weather conditions of 2011. I hope this isn’t an indication that global warming has progressed to the point that these weather conditions are here to stay. I’m hoping that’s not the case!

The following photos were taken 3 days ago:

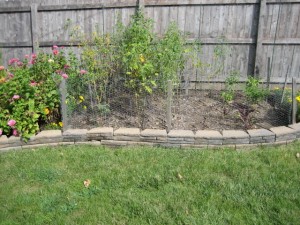
garden1 sept 15 2011

garden2 sept 15 2011

garden3 sept 15 2011

garden4 sept 15 2011

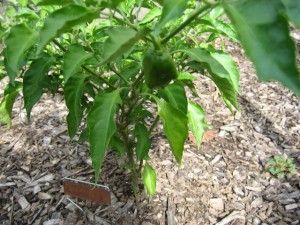
A single habanero pepper

garden5 sept 15 2011

A paltry amount of jalapeno peppers

garden6 sept 15 2011

One butternut squash which may not mature

garden7 sept 15 2011

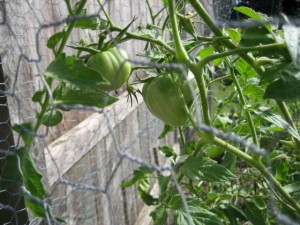
One of the few puny Cherokee Purple tomatoes

garden8 sept 15 2011

garden9 sept 15 2011

garden10 sept 15 2011

Pineapple tomatoes which are smaller than normal

garden11 sept 15 2011

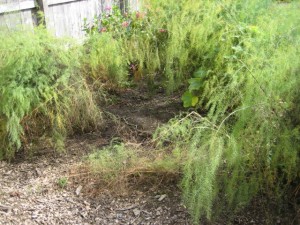
My sickly asparagus plants

garden12 sept 15 2011

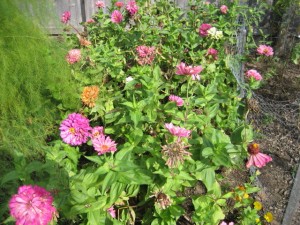
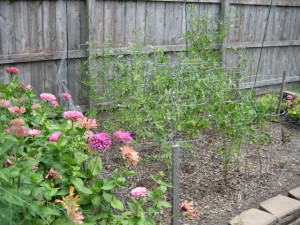
The zinnias tolerated the 2011 summer fairly well

garden13 sept 15 2011

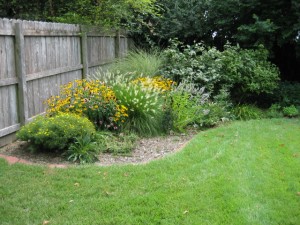
The fading wildflower garden

garden14 sept 15 2011

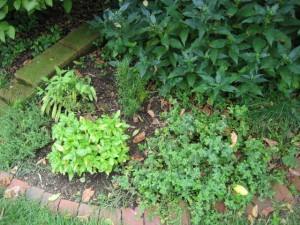
The herb garden showing meager basil and a barely alive tarragon plant

The game plan for next year is to move the herb garden to a new location that gets more sun. Also, I’m considering building a permanent structure which will totally enclose the veggie garden w/a  chicken wire fence (even above the plants). That may be the best solution to the ongoing battle w/ the squirrels and other critters that seem undeterred by the current fence!!

Hoping for better days to come…

Bruno

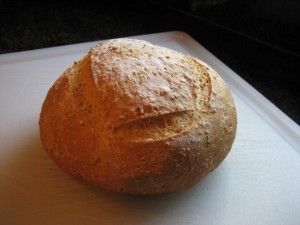
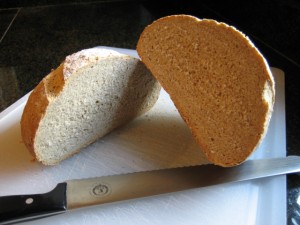
Eight Grain Boule

A delicious bread for the upcoming week!

eight grain boule 1

eight grain boule 2

Ingredients:

1/2 cup 7 grain blend (I used Bob’s Red Mill brand)

1/2 cup toasted rolled oats 

3 cups all purpose flour

1 cup wheat flour 

1/4 cup olive oil

1/1/4 cups plus 1/4 cup tepid water

2 teaspoons salt

1  tablespoon active dry yeast

cornmeal for dusting pizza peel

Procedure:

1) Place yeast in a large bowl and pour 1/4 cup tepid water over the yeast; let sit until it becomes foamy (about 5 minutes)

2) In a seperate bowl mix together the flours, 7 grain blend, rolled oats and salt

3) Add olive oil and remaining 1 1/4 cups tepid water to the yeast

4) Slowly add the flour mix to the yeast while using your free hand to incorporate the flour and yeast

5) Place the dough on a floured surface and knead for 8 to 10 minutes (add more flour a little bit at a time if dough is too sticky)

6) Form dough into a ball and place back into the large bowl (dust the bottom of the bowl w/ flour before placing dough into it); dust top of dough ball w/ flour and cover bowl w/ plastic wrap (I use a shower cap that I got from a hotel – it fits snugly over the bowl)

7) Let dough ferment (i.e., first rise) for 1 1/2 hours at room temperature (if your kitchen is too cold, place bowl in unlit oven w/ the light on – the temperature is usually 70 degrees F). The dough should have at least doubled in size when ready to shape

8) Remove dough from bowl and form dough into a ball (boule) shape, dust top w/ flour, cover w/ plastic and let rise for 45 minutes (i.e., second rise)

9) Meanwhile,  preheat oven and pizza stone to 450 degrees F

10) When second rise is complete, slash top of boule w/ a serrated knife

11) Slide boule onto pizza stone, then mist sides of oven w/ water (I use a spray bottle) and quickly close oven door; for the first 2 minutes of baking, mist the sides of the oven every 30 seconds – this delays crust formation and allows the bread to rise rapidly and evenly

12) After 20 minutes reduce temperature to 375 degrees F and rotate bread front to back for even baking; bake for another 15 – 20 minutes

13) Remove bread from oven and tap the bottom; if it make a hollow sound it’s ready!

14) Allow bread to cool completely on a cooling rack before slicing

Baker’s notes: I love this bread! The crust is crunchy, the crumb is tight and textured w/ all the extra grains. I slice the entire boule,  seal it in a freezer bag and pop it in the freezer. When I want to toast some up, I just take what I need, reseal the bag and pop it back in the freezer (a great trick my mom showed me to keep bread fresher)!

Happy Cooking!!

Bruno

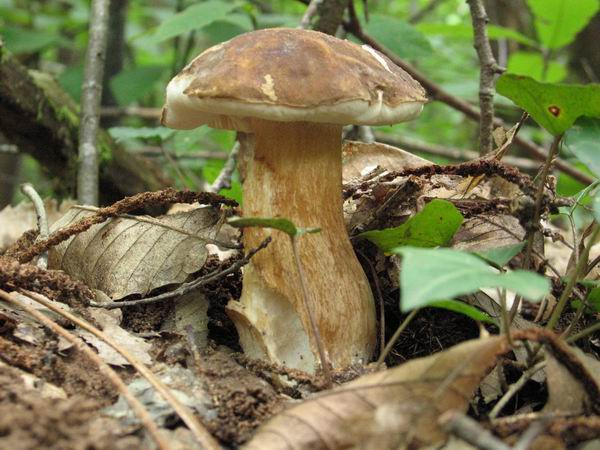
French Porcinis

porcini 1

porcini 2

My brother sent me these photos of  mushrooms he found in a forest near where he lives in France. He said it’s been cooler and wetter than normal there and the conditions are ripe for mushroom hunting. He and his wife are going  hunting for more bounty in their secret spot which is located in this region:  http://www.perigordnoir.com/en/index.php.

Happy Hunting!

Bruno

Veggie Garden 2011 – Update #1

Here’s the latest news on this year’s garden.

All the plants have grown but there is very limited fruit production so far. I think the extreme heat we’ve been experiencing here has stunted the progress of most everything.

Some highlights (and lowlights):

The few near ripe tomatoes that were on the Black Krim plant were eaten by either a squirrel or an opossum. Can’t say that I blame them… those are extremely tasty tomatoes!!  The green zebra tomato plant is dying as it did last year. I trimmed the dead branches and sprayed it w/ organic pesticide/fungicide. Hopefully it will survive because I’ve been looking forward to trying this variety of tomato since last year. I also sprayed and fertilized all the other plants.  

My butternut plants were torn apart ( but fortunately not completely) – probably by a squirrel looking for moisture in the vines. They are such destructive critters!

There are a few jalapeno peppers and one habanero ripening.

Four of the six Swiss chard plants survive so this fall I’ll be enjoying these tasty greens!

For some reason my tarragon is not thriving but other herbs are doing well. I’ll probably transplant the tarragon to a different spot in the fall in hopes it will do better next year.

The zinnias and wildflower garden are going gangbusters!

The temperatures are forecast to be in the upper 80’s this week. Maybe this will help the plants to stabilize and start producing. Fingers crossed!!

Here are the latest photos taken on August 6th:

garden1 August 6 2011

garden2 August 6 2011

garden3 August 6 2011

garden4 August 6 2011

garden5 August 6 2011

garden6 August 6 2011

garden7 August 6 2011

garden8 August 6 2011


Better days ahead!

Bruno

Strawberry Gelato w/ Caramelized Bananas

strawberry gelato 1

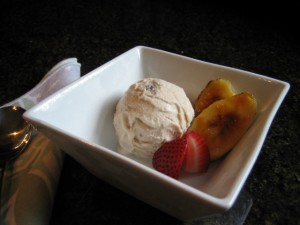
It’s definitely summertime here in St. Louis, so this means it’s time to try out some new gelato flavors! I had a couple of friends over for pizza the other night and served this gelato for dessert. The consensus was this recipe is a keeper. The sweetness from the strawberries and caramelized bananas allowed me to reduce the sugar in the mixture.

Strawberry Gelato w/ Caramelized Bananas

Ingredients:

1 pound strawberries pureed and seeded (pass through a fine mesh sieve to remove seeds)

6 egg yolks

2 bananas – sliced diagonally into 1/4 inch slices

1 quart half & half

3/4 cups sugar

sugar for caramelizing bananas (you will need a torch to do this)

Procedure:

1) Remove leaves from strawberries, quarter the berries then puree in food processor

2) In a metal bowl, whisk egg yolks and sugar until mixture becomes smooth and pale yellow

3) Place half & half in a heavy pot and heat until scalded  

4) Very slowly whisk half & half into egg/sugar mixture so as not to curdle the mixture

5) Place bowl w/ mixture over a pot of simmering water, stirring continuously w/ a heat resistant spatula until mixture coats the back of a metal spoon (do not let mixture exceed 170 degrees F to prevent curdling), then quickly place bowl in an ice bath to stop the cooking process and promote rapid cooling. Stir in strawberry puree

6) Once cool, refrigerate mixture for at least 4 hours or overnight

7) Place sliced bananas on a sheet pan, sprinkle w/ sugar then torch like you would creme brulee (save 1/4 of the caramelized bananas for garnishing, or snack on them while churning gelato – your choice!)

8) Churn mixture in ice cream maker according to manufacturer’s instructions

9) Pour gelato into a 2 quart plastic container, stir in 1 1/2 of the caramelized bananas (making sure they are distributed evenly throughout the mix) then place a piece of parchment paper cut to size on the surface of gelato (this will reduce air exposure and prevent ice crystals from forming on the surface of the gelato), seal container and freeze until firm 

Yield: Approx. 1 1/2 quarts 

Cook’s notes: Despite the very light pink color of the gelato, it had a distinct strawberry flavor. Bananas are a classic combination w/ strawberries  – caramelizing them lended a bit more complexity to the blend.

Eat gelato, stay cool! 

Bruno 

Garden 2011

Hello, and welcome to the 2011 edition of my garden! This year is an experiment of sorts – I saved seeds from last year’s crop and grew most of the plants for this year’s garden from those seeds. Started from seed were butternut squash, jalapeno peppers, cherokee purple, yellow brandywine and pineapple tomatoes.  I also purchased some basil and Swiss chard seeds. Additionally, I bought a couple of tomato plants that I had no seeds for (green zebra and black krim) and a habanero pepper plant. The seeds grew into nice little plants which were transplanted into the garden on June 1st. The flowers were planted on June 2nd. As you will see in the photos, I rotated the location of the plants this year to improve growth and yield. The zinnias and marigolds that were planted this year are also in new locations.

This year’s garden is truly a labor of love as you will understand after a brief explanation. On May 23rd I was out for a bike ride in Forest Park (this was the day after the tornado that hit Joplin, MO). About halfway through my ride a fast moving thunderstorm was approaching. It began to rain and the winds started kicking up so I decided it would be best to seek shelter to wait out the storm. As I was heading to the shelter a branch fell out of a tree, hit my handlebars and knocked me off  the bike. I took a pretty hard fall on my left side which resulted in some cuts and bruises, a few cracked ribs and a separated shoulder. The pain has been severe at times.  Despite my injuries, I was determined to get my garden planted before the weather became too hot here in St. Louis. I pushed through the pain and got the job done. It took at least twice as long to get everything planted but I’m so glad that I persevered. I’m hoping the rewards from this garden will be extra sweet!!

The herb garden has a new look as well. My sage, tarragon and thyme didn’t survive the winter so I replaced them w/ new plants. As usual I put in rosemary and basil (that I started from seed).

So far everything is looking pretty good! All total I have 4 pineapple tomato plants, 4 cherokee purple tomatoes, 4 yellow brandywine tomatoes, 1 green zebra tomato, 1 black krim tomato, 3 jalapeno pepper plants (one plant was snapped during a strong rain storm), 1 habanero pepper, 6 Swiss chard plants (2 plants are struggling and probably won’t survive), and 5 butternut squash plants. I had extra plants that were adopted by grateful friends.

On the flower side, I put in tall and short zinnias for bursts of color all summer long. Marigolds were planted along the northern and southern edges of the garden to deter rabbits and squirrels

Last fall I planted several new additions in the wildflower garden to attract more bees, butterflies and hummingbirds. New to the garden are a red coneflower, anise hyssop, gooseneck loosestrife and a butterfly bush.

And now on to the photos (taken yesterday):
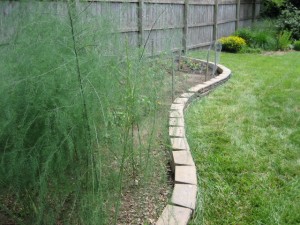
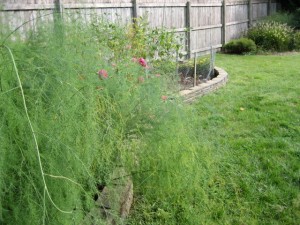
garden1 2011

Asparagus that has ferned out (northern view of garden)
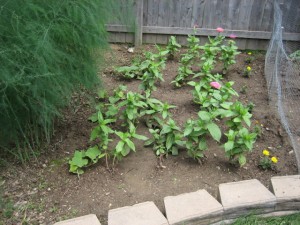
garden2 2011

Tall zinnias w/ butternut squash to the left and marigolds to the right
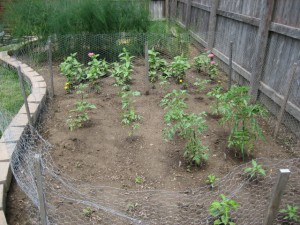
garden3 2011

View from the southern end of the garden
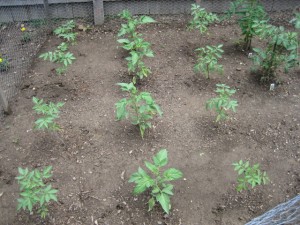
garden4 2011

Pineapple, yellow brandywine, cherokee purple, green zebra and black krim tomatoes
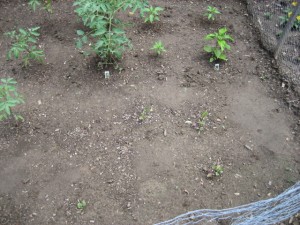
garden5 2011

Swiss chard in the foreground w/ jalapeno and habanero peppers in the background to the right
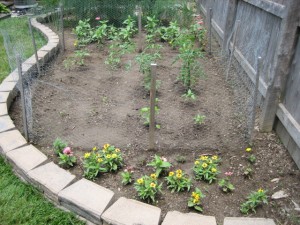
garden6 2011

The short zinnias and marigolds at the southern end of the garden
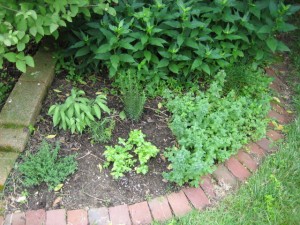
garden7 2011

Herb garden: in front from left to right are English thyme, basil and oregano; in back from left to right are sage, tarragon, rosemary and chives (behind the oregano)
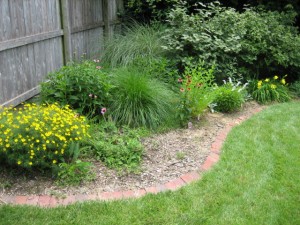
garden8 2011

The wildflower garden

garden9 2011

Western view of the garden

Notes for next year:

Transplant plants into larger pots and plant stems deeper for stronger, less leggy plants. Provide nutrients at this time as well.

Start Swiss chard seeds in separate pots to improve survival rate and simplifly transplantation.

That’s all folks!

Bruno
Almost No Knead Wheat Bread

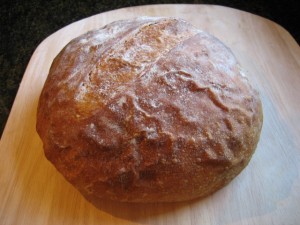
almost no knead wheat1

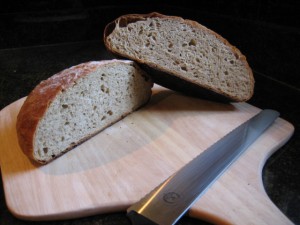
almost no knead wheat2


Almost No Knead Wheat Bread (recipe from America’s Test Kitchen) 

Ingredients:

  • 2 cups unbleached all-purpose flour (10 oz), plus additional flour for dusting work space
  • 1 cup whole wheat flour
  • 1/4 teaspoon instant or rapid-rise yeast
  • 1 1/2 teaspoons table salt
  • 2 tablespoons honey
  • 3/4 cup, plus 2 Tblsp water(7oz), @ room temperature
  • 1/4 cup, plus 2 Tblsp mild-flavored lager(3oz), such as Budweiser
  • 1 Tablsp white vinegar

Procedure:

  1. Whisk flours, yeast, & salt in a large bowl. Stir the honey into the water, then add the water, beer, and vinegar to the dry ingredients. Using rubber spatula, fold mixture, scraping up dry flour from bottom of bowl until shaggy ball forms.
  2. Cover bowl w/ plastic wrap & let sit @ room temperature 8 to 18 hrs. (mine fermented for 15 hours)
  3. Lay 12 by 18 inch sheet of parchment paper inside a 10-inch skillet and spray w/ nonstick cooking spray.
  4. Transfer dough to lightly floured work surface and knead 10-15 times.
  5. Shape dough into a ball by pulling edges into middle.
  6. Transfer dough, seam side down, to parchment-lined skillet and spray surface of dough w/ nonstick cooking spray.
  7. Cover w/ plastic wrap, sprayed w/ cooking spray, and let rise @ room temperature for 2 hours.
  8. About 30 minutes before baking, adjust oven to lowest position, place a 6-8 qt. heavy-bottomed Dutch oven w/ lid on rack & heat oven to 500 degrees F.  (I used a cast iron dutch oven)
  9. Lightly flour top of dough, and using a razor blade or a sharp knife, make one 6-inch long and 1/2-inch deep slit along top of dough.
  10. Remove pot from oven, remove lid, & place dough (by lifting parchment overhang), & lower into pot.(Let any excess parchment hang over pot edge).
  11. Cover pot & place in oven.
  12. Reduce temperature to 425 degrees F & bake, covered, for 30 minutes.
  13. Remove lid & continue to bake until loaf is deep brown & instant-read thermometer inserted into the center registers 210 degrees F, 20-30 minutes longer.
  14. Carefully remove bread from pot; transfer to wire rack & cool to room temperature, about 2 hours.
  15. Makes 1 loaf, and is best eaten the day it is baked, but can be wrapped in aluminum foil and stored in a cool, dry place for up to 2 days.

Bakers notes: I removed the bread from the oven after 30 minutes because the bottom was starting to get charred but the internal temperature was only 204 degrees F.

The crust wasn’t as crisp as I would have liked but the bread had a full bodied aroma and tasted terrific!

Next time I’ll tweek the recipe by  1) lowering the oven temperature ; 2) putting the dutch oven on a higher rack; and 3) removing the lid earlier during the baking process. I hope these changes will result in a better end product.   

Happy Baking!

Bruno