pornjk, pornsam, xpornplease, joyporn, pornpk, foxporn, porncuze, porn110, porn120, oiporn, pornthx, blueporn, roxporn, silverporn, porn700, porn10, porn40, porn900

Author Archive for brunosdreamPage 23 of 29

Cinnamon Buns

I met the challenge… the Daring Bakers challenge that is!

daring-bakers.jpg

I am very excited to be involved w/ this great group of talented bakers. For September, we were asked to try our hand at cinnamon buns. I’ve never made these delicious goodies but was looking forward to it because who can resist the smell of cinnamon and other spices wafting from the oven!! And who can resist not biting into one (or two) of the finished product! I know I can’t!! Here’s my version of the selected recipe…


cinnamon-buns1.jpgcinnamon-buns3.jpgcinnamon-buns2.jpg

Cinnamon Buns (from Peter Reinhart´s The Break Baker´s Apprentice)

DAYS TO MAKE: 1

15 minutes mixing; 3 1/2 hours fermentation, shaping and proofing; 20 to 40 minutes baking.

Yield: Makes 8 to 12 large or 12 to 16 smaller cinnamon buns

Ingredients:

  • 6 1/2 tablespoons (3.25 ounces) granulated sugar
  • 1 teaspoon salt
  • 5 1/2 tablespoons (2.75 ounces) shortening or unsalted butter or margarine
  • 1 large egg, slightly beaten
  • 1 teaspoon lemon extract OR 1 teaspoon grated zest of 1 lemon
  • 3 1/2 cups (16 ounces) unbleached bread or all-purpose flour
  • 2 teaspoons instant yeast*
  • 1 1/8 to 1 1/4 cups whole milk or buttermilk, at room temperature OR 3 tablespoons powdered milk (DMS) and 1 cup water
  • 1/2 cup cinnamon sugar (6 1/2 tablespoons granulated sugar plus 1 1/2 teaspoons ground cinnamon, or any other spices you want to use, cardamom, ginger, allspice, etc.)
  • White fondant glaze (at the end of the recipe.)  

*Instant yeast contains about 25% more living cells per spoonful than active dry yeast, regardless of the brand. Instant yeast is also called rapid-rise or fast-rising.

1. Cream together the sugar, salt, and shortening or butter on medium-high speed in an electric mixer with a paddle attachment (or use a large metal spoon and mixing bowl and do it by hand); if you are using powdered milk, cream the milk with the sugar, and add the water with the flour and yeast. Whip in the egg and lemon extract/zest until smooth. Then add the flour, yeast, and milk. Mix on low speed (or stir by hand) until the dough forms a ball. Switch to the dough hook and increase the speed to medium, mixing for approximately 10 minutes (or knead by hand for 12 to 15 minutes), or until the dough is silky and supple, tacky but not sticky. You may have to add a little flour or water while mixing to achieve this texture. Lightly oil a large bowl and transfer the dough to the bowl, rolling it around to coat it with oil. Cover the bowl with plastic wrap.

2. Ferment at room temperature for approximately 2 hours, or until the dough doubles in size.

3. Mist the counter with spray oil and transfer the dough to the counter. Proceed as shown in the photo on the left for shaping the buns.

(Transcription: (A) Roll out the dough with a rolling pin, lightly dusting the top with flour to keep it from sticking to the pin. Roll it into a rectangle about 2/3 inch thick and 14 inches wide by 12 inches long for larger buns, or 18 inches wide by 9 inches long for smaller buns. Don´t roll out the dough too thin, or the finished buns will be tough and chewy rather than soft and plump. (B)Sprinkle the cinnamon sugar over the surface of the dough and (C) roll the dough up into a cigar-shaped log, creating a cinnamon-sugar spiral as you roll. With the seam side down, cut the dough into 8 to 12 pieces each about 1 3/4 inches thick for larger buns, or 12 to 16 pieces each 1 1/4 inch thick for smaller buns.)

4. Line 1 or more sheet pans with baking parchment. Place the buns approximately 1/2 inch apart so that they aren´t touching but are close to one another.

5. Proof at room temperature for 75 to 90 minutes, or until the pieces have grown into one another and have nearly doubled in size. You may also retard the shaped buns in the refrigerator for up to 2 days, pulling the pans out of the refrigerator 3 to 4 hours before baking to allow the dough to proof.

6. Preheat the oven to 350°F (175°C) with the oven rack in the middle shelf.

7. Bake the buns for 20 to 30 minutes, or until golden brown.

8. Cool the buns in the pan for about 10 minutes and then streak white fondant glaze across the tops, while the buns are warm but not too hot. Remove the buns from the pans and place them on a cooling rack. Wait for at least 20 minutes before serving.

White fondant glaze for cinnamon buns

Cinnamon buns are usually topped with a thick white glaze called fondant. There are many ways to make fondant glaze, but here is a delicious and simple version, enlivened by the addition of citrus flavor, either lemon or orange. You can also substitute vanilla extract or rum extract, or simply make the glaze without any flavorings.

Sift 4 cups of powdered sugar into a bowl. Add 1 teaspoon of lemon or orange extract and 6 tablespoons to 1/2 cup of warm milk, briskly whisking until all the sugar is dissolved. Add the milk slowly and only as much as is needed to make a thick, smooth paste.

When the buns have cooled but are still warm, streak the glaze over them by dipping the tines of a fork or a whisk into the glaze and waving the fork or whisk over the tops. Or, form the streaks by dipping your fingers in the glaze and letting it drip off as you wave them over the tops of the buns. (Remember to wear latex gloves.)

**The only variations I made to the recipe were:

1) I used orange zest instead of lemon zest

2) For the spices, I used Penzy’s Cake Spice and ground cardamom seeds

3) I brushed the fondant onto the buns which resulted in a light glaze

I brought the buns to my friends’ house for dessert. We all loved them and found it hard to resist eating all of them!!

Until next time…

Bruno

Telluride, Colorado


telluride1.jpgtelluride2.jpgtelluride3.jpg

telluride4.jpgtelluride5.jpgtelluride6.jpg

Welcome to the Telluride airport… located on a plateau 9080 feet above sea level. The runway is somewhat concave – you land on a downward slope and take off going uphill. If winds exceed 10 nautical miles per hour you must divert!

Pilots say it’s one of the most challenging airports to fly into. See for yourself…

 Safe travels :-)

Bruno

Basil Mojito

basil-mojito2.jpgbasil-mojito1.jpg

This year, when you have friends over to harvest your basil and make pesto, whip up a batch of these to quench their thirst!!

They’re easy drinking and, ahhhh, so refreshing…

Basil Mojito (recipe adapted from Texas Monthly)

Ingredients:

8 limes – quartered

8 ounces simple syrup

40 medium sized fresh basil leaves  – chiffonade, plus 4 sprigs for garnish

2 cups ice – coarsely crushed

6 ounces light rum

8 ounces club soda

Procedure:

1) Make simple syrup: In a medium size pot add 1 cup sugar, 1 cup water and 14 basil leaves (chiffonade). Simmer over medium heat until sugar is dissolved then set aside to cool. Strain out the basil (you will have extra syrup)

2) In a large pitcher, squeeze the limes, add simple syrup and basil then muddle to extract flavor

3) Add rum, ice and club soda; stir

4) Pour into your favorite mojito glasses and garnish w/ basil sprig

** Makes 4 mojitos

Cheers!

 Bruno

Vietnamese Coffee Gelato w/ Toblerone Chunks and Sesame Seed Tuile Mini Cones

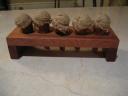
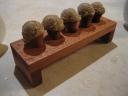
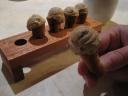
As my contribution to La Festa al Fresco festaalfresco2007.jpg at Cream Puffs in Venice I volunteered to bring a dessert. This year my dessert is Vietnamese coffee gelato w/ Toblerone chocolate chunks. I also made homemade mini cones so the party guests can easily pop these bite-size bits of yum directly into their mouths for a nice brain freeze! Or if they choose to, they can take dainty little bites, but I prefer to pop the little things in my mouth all at once for a great tasting sensory experience!!

 vietnamese-coffee-gelato3.jpgvietnamese-coffee-gelato2.jpgvietnamese-coffee-gelato1.jpg

Vietnamese Coffee Gelato w/ Toblerone Chunks (recipe adapted from Food & Wine)

Ingredients:

3 cups whole milk

One 14 ounce can  sweetened condensed milk

1 cup expresso

1 1/2 pinches of salt

6  large egg yolks

6 ounces Toblerone (coarsely chopped)

Procedure:

1) In medium saucepan combine the whole milk, condensed milk, expresso and salt, then bring to a simmer

2) In medium size mixing bowl, whisk egg yolks until pale yellow

3) Whisk 2 tablespoons of the milk mixture into the egg yolks (do this slowly to avoid curdling the yolks), then whisk in the remaining milk little by little

4) Place bowl over a pot of simmering water and cook over a gentle heat, stirring constantly, until the mixture coats the back of a spoon (do not let temperature exceed 170 degrees F or mixture will start to curdle)

5) Cool in an ice bath

6) Chill for at least 4 hours in fridge

7) Churn in ice cream maker according to manufacturer’s instructions, adding the chopped Toblerone halfway through the churning process

8) Transfer gelato to a 2 quart plastic container, place a piece of parchment paper cut to size on the surface of gelato (this will reduce air exposure and prevent ice crystals from forming on the surface of the gelato), seal the container and freeze until firm

Yield: Approx. 1 ½ quarts

Tuile Mini Cones w/ Black Sesame Seeds (recipe adapted from The French Laundry Cookbook)

Ingredients:

1/4 cup plus 3 tablespoons all-purpose flour

1 tablespoon plus 1 teaspoon sugar

8 tablespoons (4 ounces) unsalted butter, softened but still cool to the touch

2 large egg whites, cold

2 tablespoons black sesame seeds

Procedure:

1) In a medium mixing bowl, mix together the flour and sugar

2) In a separate bowl, whisk the softened butter until it is smooth and mayonnaise-like in texture

3) Using a stiff spatula or spoon, beat the egg whites into the dry ingredients until completely incorporated and smooth

4) Whisk in the softened butter by thirds, scraping the side of the bowl as necessary and whisking until the batter is creamy and without any lumps

5) Transfer batter to a smaller container so it will be easier to work with

6) Preheat oven to 400 degrees F

7) Make a 4 inch hollow stencil

8) Place a Silpat on the counter (it is easier to work on the Silpat before it is placed on the sheet pan)

9) Place the stencil on one corner of the Silpat and, holding the stencil flat against the Silpat, scoop some of the batter onto the back of an offset spatula and spread it in an even layer over the stencil, then run the spatula over the entire stencil to remove any excess batter (after baking the first batch of cones you will be able to judge the correct thickness: you may need a little more or less batter to adjust the thickness of the cones). There should not be any holes in the batter

10) Lift the stencil and repeat the process to make as many rounds as you have molds or to fill the Silpat, leaving about 1 1/2 inches between the cones

11) Sprinkle each cone w/ a pinch of black sesame seeds

12) Place the Silpat on a heavy baking sheet and bake for 4 to 6 minutes, or until the batter is set and rippling from the heat (the cones may have browned in some areas, but they will not be evenly browned at this point)

13) Open the oven door and place the baking sheet on the door (this will help keep the cones warm as you roll them, and will prevent them from becoming too stiff to roll)

14) Flip a cone over on the sheet pan, sesame seed side down, and place a 4 1/2 inch cone mold (size #35) at the bottom of the round (if you are right-handed, you will want the pointed end of the mold on your left and the open end on your right). The tip of the mold should touch the lower left edge (at about 7 o’clock on a clock face)

15) Fold the bottom of the cone up and around the mold and carefully roll upward and towards the the left to wrap the cone tightly around the mold: it should remain on the sheet pan as you roll. Leave the cone wrapped around the mold and continue to roll the cones, seam side down, on the sheet pan so they lean against each other to prevent them from rolling

16) When the cones are rolled, return them to the oven shelf, close the door, and bake for an additional 3 to 4 minutes to set the seams and color the cones a golden brown. If the color is uneven, stand the cones on end for a minute or so more until the color is even

17) Remove the cones from the oven and allow to cool slightly, 30 seconds or so. Gently remove the cones from the molds and cool for several minutes on paper towels

18) Remove the Silpat from the baking sheet, wipe the excess butter from it, and allow to cool down before spreading the next batch

19) Store the cones for up to 2 days (for maximum flavor) in an airtight container

Yield: Approx. 24 cones

Now I’m off to the party…. hope to see ya there!!

 A votre sante’…..

Bruno

Osso Buco w/ Risotto alla Milanese

osso-buco1.jpgbroccolini1.jpg

I typically don’t eat veal for a couple of reasons:

1) It doesn’t have much flavor (and their are cheaper meats that are way more flavorful).

2) I’m becoming more aware of  the way animals are treated on their way to and at the slaughter house – the veal making process is typically not very humane.

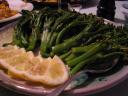
When I invited a family friend over for dinner I let him choose between 2 main courses I was thinking of preparing, and guess what he chose? Yes, veal, specifically osso buco. I made saffron risotto for the accompanying starch because it was traditionally what my mom made w/ osso buco. For the veggie I kept it simple and made broccolini which I served at room temperature w/ lemon and olive oil. For dessert I churned another batch of sweet potato gelato w/ candied pecans (it is quickly becoming one of my favorite flavors!).

Osso Buco w/ Gremolata (recipe adapted from Epicurious.com) **serves 6 to 8

Ingredients:

8 large 2 1/2 inch thick veal shanks (pat dry each shank and tie securely w/ kitchen string to keep meat attached to the bone)

7 tablespoons unsalted butter

3 tablespoons olive oil

1 1/2 cups dry white wine

1 1/2 cups finely chopped onion

3/4 cup finely chopped carrots

3/4 cup finely chopped celery

1 teaspoon minced garlic

4 cups beef or chicken broth (I used 2 cups of each)

1 1/2 cups drained canned plum tomatoes (chopped)

A cheesecloth bag containing 6 fresh parsley sprigs, 4 fresh thyme sprigs, and 1 bay leaf

 1/2 teaspoon salt

All-purpose flour for dredging the veal shanks

For the gremolata:

1/2 cup minced fresh parsley (preferably flat-leafed)

2 tablespoons freshly grated lemon zest

1 tablespoon minced garlic

 **In a bowl, mix together and set aside until service.

Procedure:

1) Season veal shanks w/ salt and pepper and dredge in the flour, shaking off the excess.

2) In a heavy skillet heat 3 tablespoons each of butter and olive oil over moderately high heat until the foam subsides, then brown the shanks in batches, adding some additional butter and oil as necessary, and transfer them to a platter when browned.

3) Add the wine to the skillet, bring to a boil and scrape the brown bits from the sides and bottom. Reduce until only 1/2 cup of wine remains and reserve in a small bowl.

4) In a flameproof casserole just large enough to hold the veal shanks in one layer, cook the onion, carrots, celery and the garlic in the remaining 4 tablespoons of butter over moderately low heat, until the vegetables are softened.

5) Add the shanks to the casserole  w/ any accumulated juices, as well as the reserved wine mixture and enough broth to almost cover the shanks.

6) Spread the tomatoes over the shanks, add the cheesecloth bag, the salt, pepper to taste and bring the liquid to a simmer over moderately high heat.

7) Preheat oven to 325 degrees F, cover the casserole and braise  for 2 hours or until veal is tender.

8) Tranfer shanks to an ovenproof serving dish, carefully remove the strings and keep warm in oven.

9) Skim the fat off the pan juices and reduce until there is only about 3 cups remaining.  

10) Put pan juices in a gravy boat at service time.


Risotto alla Milanese (recipe adapted from Clifford A. Wright and Allrecipes.com)

** serves 6 to 8

Ingredients:

2 1/2 cups arborio rice

8 cups beef broth (I used a combination of beef and veggie broth)

1 teaspoon saffron powder (place in a small bowl w/ 3 tablespoons warm water)

1 small onion, very finely chopped

3/4 cups dry white wine

1/2 cup unsalted butter (1 stick)

1 1/4 cup Parmesan cheese (freshly grated)

Salt and pepper to taste

Procedure:

1) Heat broth and keep it simmering… have a ladle nearby. 

2) In a large, heavy saucepan, melt 3/4 of the butter and cook the onion over medium heat until translucent, stirring frequently.

3) Add wine to the onion and continue cooking until wine is nearly evaporated.

4) Add the rice and cook for 2 minutes, stirring to evenly coat the grains.

5) Add 1 cup of the hot broth, season w/ salt and pepper, and stir almost continuously until the liquid evaporates. Ladle in more broth, continue stirring, while liquid evaporates. Continue this process until rice is between al dente and tender.

6) A few minutes before rice is done, add the diluted saffron and stir until well incorporated. Stir in the remaining butter  and 1 cup of the parmesan cheese.

7) Serve w/ remaining parmesan cheese.

As you can see in the photo, I mounded the risotto on the center of a very large serving dish, then carefully (so they remained intact) placed the osso buco around the risotto.  I didn’t sprinkle them w/ a bit of the gremolata as the recipe indicated because I wasn’t sure if everyone would like it  – I let them add the gremolata if desired. If you have any parsley left, you can use it to garnish the serving dish too.

Buon Appetito!

Bruno

Bastille Day 2007

It was a great day to celebrate the storming of the Bastille. This is the second annual Bastille Day party chez Paula’s maison. She really outdid herself this year! The menu was magnifique and she even had a French music ensemble playing some Edith Piaf, among other tunes, to set the mood!  There were many more people attending, however my friend and former co-blogger, Duane, was not present this year to chronicle the event as he did last year. Unfortunately he recently found out his cancer has returned and he is once again battling this horrible disease. My thoughts and prayers are w/ him. I wish him the best and hope he will be present next year and able to announce his cancer is once again in remission. Duane, since you were unable to be there, here are some photos for your vicarious enjoyment. I tip my glass to you my friend, may you be back in action soon…

img_1456.JPGimg_1459.JPGimg_1458.JPG 

Le menu; amuse bouche

img_1461.JPGimg_1477.JPGimg_1473.JPG 

Le dinner

img_1460.JPGimg_1462.JPGimg_1464.JPG 

Paula avec ami; Herve'; la music

img_1453.JPGimg_1486.JPGimg_1487.JPG 

Mon tutti fruitti; autre dessert

img_1467.JPGimg_1474.JPGimg_1470.JPG 

Les party people

Salut…

Bruno

A Week in the Life – The Culinary Tour (i.e., Pigging Out!)

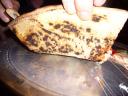
We had a great week flying around the US and sampling the food of the region whenever we had the opportunity! We started our eating tour in Denver, where we had dinner at Las Brisas, a great little Mexican restaurant near our hotel. I don’t have any photos but you can click the link for their menu. Next stop Jackson Hole, where we had lunch at Sweetwater Restaurant. They serve great elk burgers and elk sausage sandwiches! The next evening we found ourselves in Des Moines, Iowa. We had dinner at Centro (sorry, no photos, but check out the link), then strolled around the Des Moines Art Festival which was in progress. As luck had it, later in the week we landed in New York City. We stopped in the Shark Bar at Spring and Mulberry Street for a couple of Belgian beers (Hoegaarden wheat), then headed over 1 block on Spring to Lombardi’s to sample some of their famous coal fired oven pizzas. The ovens heat up to 850 degrees F, creating a beautifully crispy, chewy and blistered crust. I tried to get the dough recipe, but apparently it’s top secret! After the pizza we headed over to Little Italy for dessert at Ferrara Cafe. They serve great gelato and cannoli among other things!

Hope you enjoy the photos….

 Ciao,

Bruno

jackson-hole1.jpgjackson-hole2.jpgjackson-hole3.jpg

Jackson Hole, Wyoming

jackson-hole4.jpgjackson-hole5.jpgjackson-hole6.jpg

Jim, Jeff and me in front of Sweetwater

jackson-hole7.jpgjackson-hole8.jpgjackson-hole9.jpg

jackson-hole10.jpgjackson-hole11.jpgjackson-hole12.jpg

jackson-hole13.jpgjackson-hole15.jpgjackson-hole14.jpg

jackson-hole16.jpgjackson-hole17.jpgjackson-hole18.jpg

Up, up and away!!

shark-bar1.jpglittle-italy3.jpggrand-central-station1.jpg

Me in the Shark Bar…  Little Italy and Grand Central Station 

lombardis1.jpglombardis2.jpglombardis3.jpg

Lombardi’s, yum!

Les Baguettes w/ Chives

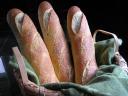
baguettes1.jpgbaguettes2.jpgbaguettes3.jpg

Zorra over at Kochtopf invited me to participate in breadbakingday, which is on July 1st. The requirements are to bake some bread w/ herbs in it, preferably fresh herbs from your garden.

breadbakingday.jpg

I’ve been wanting to try my hand at making a type of bread that I haven’t made before (or made years ago). I decided to make baguettes because I love their crunchy and chewy textures. To meet the requirement of fresh herbs I cut the fresh chives in my yard that were just sitting there doing nothing. I love the flavor of chives and figured they would add a nice zing to the bread!

This recipe is adapted from the California Culinary Academy’s baguette recipe. It’s simple, but is time consuming, so start the day before you plan on serving the bread.

Ingredients:

1  1/4 teaspoons active dry yeast

1/4 cup very warm water

4 cups bread flour

2  1/4 teaspoons salt

1  1/4 cups cool water

1/4 cup  fresh chives (finely chopped)

Corn meal for dusting sheet pan

Procedure:

1) In a large bowl dissolve the yeast in the warm water and let stand for 3 minutes

2) Add  the flour, salt, chives and cool water to the bowl, mix together w/ your hand, then remove mixture from bowl and knead for 8 minutes

3) Put dough back into the bowl, cover w/ plastic wrap and bulk ferment at room temperature for 90 minutes

4) Weigh dough into 3 equal portions then shape into tight balls, cover w/ plastic wrap and let bench rest for 1 hour

5) Shape into 14 inch baguettes by rolling from the center out using the palms of your hands

6) Place baguettes on a parchment paper lined sheet pan that is lightly dusted w/ corn meal

7) Cover w/ plastic wrap and place in refrigerator overnight

8) Let stand at room temperature for 1 hour prior to baking

9) Preheat oven to 425 degrees F

10) Dock baguettes w/ a very sharp knife or razor  – hold knife at a 30 degree angle and make 3 or 4 diagonal cuts

11) Place a pan of hot water at the bottom of the oven

12) Place baguettes in oven on middle rack and bake for 25 minutes – – quickly pour 1/2 cup of water onto the bottom sides of the oven right after placing baguettes in

13) After 1 minute quickly pour in another 1/2 cup of water – repeat once again 2 minutes later (the steam helps promote the “oven spring” and crust gloss)

14) Remove baguettes from oven and let cool

15) Share the bread w/ your friends!

**  yields 3 baguettes

I was happy w/ the end product except for many of my cuts not opening up on the baguettes while they baked. Next time I will experiment w/ the angle and depth of the cuts as I’m docking the bread.

Happy Bread Baking Day!!

Bruno

Chicken Satay w/ Coconut Curry Sauce

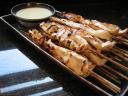
chix-satay2.jpgchix-satay1.jpg

I love the combination of curry and coconut milk. I also love this time of year because outdoor grilling is back in season and grilling imparts such a great flavor to whatever is cooking! A friend recently had a late afternoon pot luck party. I wanted to make something simple, unusual, flavorful, could be served hot or at room temperature, and was grilled. Satay popped into my mind. They cover all  of the above criteria, plus they’re fun to eat!! Here’s the recipe:

Ingredients:

1 tablespoon lemon grass (minced)

1 can coconut milk (14 ounces)

1 tablespoon garlic (minced)

1 tablespoon fresh ginger (minced)

1 teaspoon lime zest   (grated w/ microplane)

juice from 1 lime

1 teaspoon green curry paste

salt and pepper to taste

2  1/2 pounds boneless/skinless chicken breasts

24 bamboo skewers (10 inch size)

charcoal for grill

Procedure:

1) Soak skewers for 1 hour

2) For marinade, place first 8 ingredients in a 13″ x 8″ pyrex dish, heat on stove briefly to meld flavors and dissolve curry paste, then let cool

3) Slice chicken lengthwise into 1/4 inch wide pieces

4) Thread chicken onto skewers and place in marinade, cover and refrigerate for 2 hours

6) Remove chicken skewers from marinade and reserve marinade for sauce

7) Prepare grill

8) On stove, heat marinade  over medium heat for 5 minutes

9) Grill chicken skewers for approx. 2 minutes on each side

10) EAT (my favorite part)

** yields 24 skewers and approx. 1 cup of sauce

This dish is quick and easy to prepare once all the prep work is done. I hope you enjoy it as much as we did! 

A votre sante’….

Bruno

Ferry Plaza Farmers Market – San Francisco

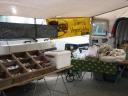
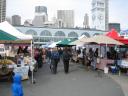
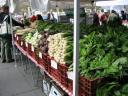
I was in San Francisco recently and was fortunate enough to have time to stop by the farmers market. It was an incredibly beautiful day so I took many photos (I was thinking blog post, blog post!). Let me share a few of my favorites w/ you:

ferry-plaza.jpgferry-plaza17.jpg

ferry-plaza3.jpgferry-plaza1.jpg

ferry-plaza18.jpgferry-plaza19.jpg Lovely and fragrant, fresh cut lavender

ferry-plaza4.jpgferry-plaza5.jpg Tierra Vegetables – this is where I get my pepper jam (they specialize in chile peppers)

ferry-plaza7.jpgferry-plaza8.jpgWe bought some of the best fresh feta cheese I’ve ever tasted – I can’t remember the vendor’s name but he’s always in the booth that’s next to the guy who sells baba ghanoush

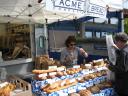
ferry-plaza9.jpgferry-plaza10.jpgMy brother-in-law buying some bread at Acme Bread Co. and posing w/ “the goods”

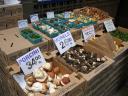
ferry-plaza11.jpgferry-plaza12.jpgBeautiful mushrooms

ferry-plaza13.jpgferry-plaza14.jpg

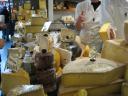
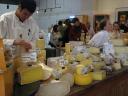
ferry-plaza15.jpgferry-plaza16.jpgCowgirl Creamery – they make awesome cheeses – one of my favorites is “Pierce Point” which has a rind coated in local dried herbs (unfortunately this cheese is only sold in the fall so I couldn’t buy any…bummer!)

The End…

Hope you enjoyed my quick tour of this fabulous market!

P.S. – Sam at Beck’s & Posh recently did a post which surprisingly discovered that some items are cheaper at the farmers market than at Safeway (the large grocery chain in California)… so support your local farmers, the planet and sustainable agriculture!

P.P.S. – I just found this great farmers market icon – “Blush the Sweet Tomato” at A Veggie Venture. a-veggie-ventures-farmers-market-icon-blush-the-tomato.gif Alanna invites bloggers to use the icon on posts to signify farmers market fresh veggies. Thanks Alanna!

Bruno